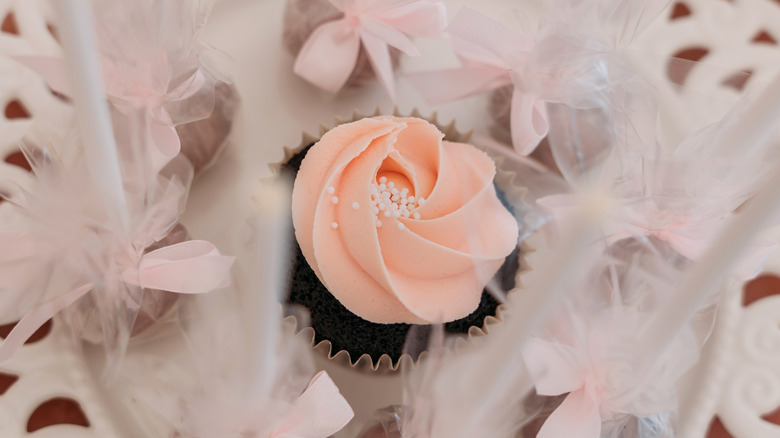
The Pro Piping Technique For The Most Beautiful Buttercream Rosettes
The art of cake decorating can be intimidating, and a potentially messy endeavor that can leave you in a sticky situation if you make a frosting mistake. The fact is, though, decorating, and especially buttercream, really isn't as hard as all that, and with a basic knowledge of a few fundamental techniques, you'll be well on your way to being the ultimate at-home pastry chef.
One such technique that'll be sure to impress is piping — specifically, creating beautiful little buttercream rosettes. They're a great place to start your piping journey, so to find out more, Food Republic spoke to Sandy Folsom, School Director at the Wilton Sweet Studio -– a legendary cake decorating school in Illinois.
The first step is getting your buttercream right, she told us: "Make sure your buttercream frosting is at the right consistency to make piping easier. You'll want to use a medium consistency for rosettes; this allows you to pipe easily and have them keep their shape." There are a few different options when it comes to what type of buttercream you use — but for beginners, a super stable frosting like Russian Buttercream (which is made with sweetened condensed milk instead of powdered sugar) might be the right choice.
Then, it's a matter of choosing the right equipment to use — and that means the best piping tips. "Different tips create different petal effects," Folsom explained. "We teach rosettes using star tips 1M or 2D." These are large, open tips that are easy to manipulate — perfect for beginners!
The best technique for piping a rosette
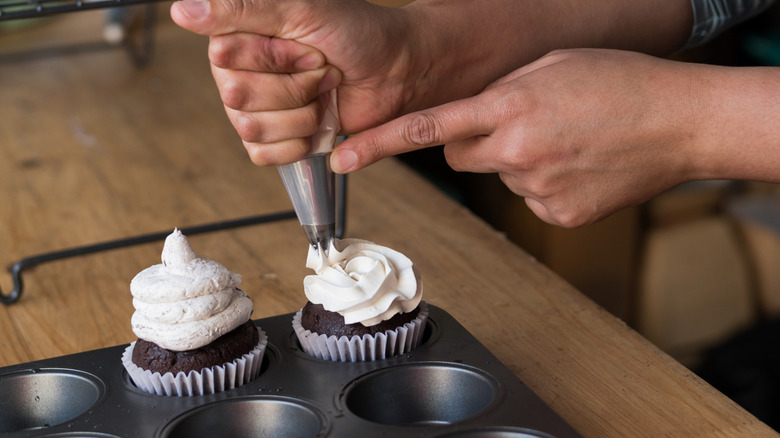
Once you've made your buttercream (or improved store-bought frosting with butter) and got your equipment ready, it's time to pipe away. We'd recommend starting with a few practice rosettes on a plate or piece of parchment to get your eye in before you try decorating a cake or cupcake. Luckily, this shouldn't take too long, as the technique is pretty simple.
"Using a decorating bag fitted with a star tip, hold the bag straight up, with the tip just slightly above the surface," Folsom told us. "Starting at the center of the cake, squeeze to form a star. Without releasing pressure, raise the tip a little bit and move it slightly to the side. This will be the starting point of your rosette."
And just like that, you're already halfway there. Next, "[p]ipe a line of icing moving toward the top of the star. Using a circular motion, pipe a tight circle around to the starting point of your rosette." Make sure you apply an even pressure throughout, so you ensure a consistent diameter for your rose.
Finally, you're going to want to make sure that you finish things off super cleanly — and that means avoiding a tip where the beginning and end of your rosette meet. The way to best avoid this, according to Folsom, is to "decrease pressure as you close your rosette. Stop squeezing right before you connect, then pull away."
The big mistake to avoid when piping rosettes
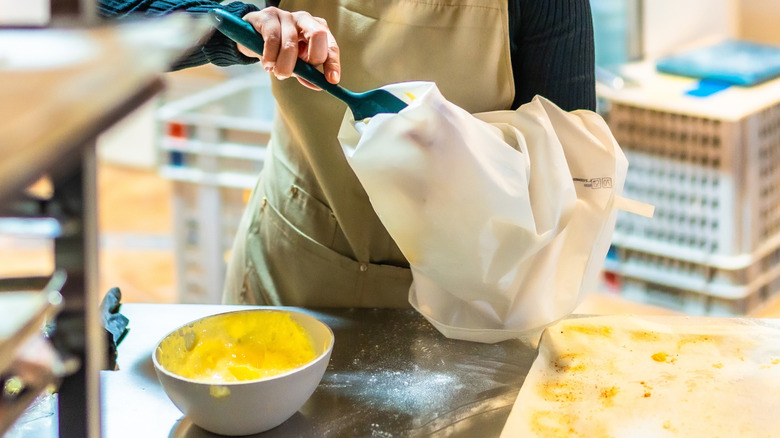
Though the technique needed to pipe rosettes isn't particularly difficult, and shouldn't take you too much time to master, there's one crucial mistake that you need to take care to avoid, according to Folsom. "Properly filling your piping bag is a very important step to making decorating with icing seamless," she said. To make sure you do, you'll need to start with the right piping bag — choosing the wrong one can make or break your bake. "You'll see lots of people using resealable bags or cling wrap on social media," Folsom told us, "but that could be a recipe for disaster as the seams aren't reinforced, and you could end up with a split that will ruin your decorating." Instead, go for a strong, purpose-built piping bag.
Filling your piping bag opens the door for another critical potential mistake: "You'll also want to make sure that you don't overfill your piping bag." This is important for a couple of reasons — first and foremost, you don't want frosting spilling out the top of your bag and all over you (and your kitchen) — but it's also important in improving the final look of your decoration. "To achieve even piping and prevent fatigue, pressure must come from the entire palm area, which is why it's essential not to overfill." Finally, to prevent any mess, "when holding the piping bag, make sure to twist the top of the bag or secure it with a bag tie to prevent your frosting from oozing upward."
Other beginner-friendly buttercream decorations
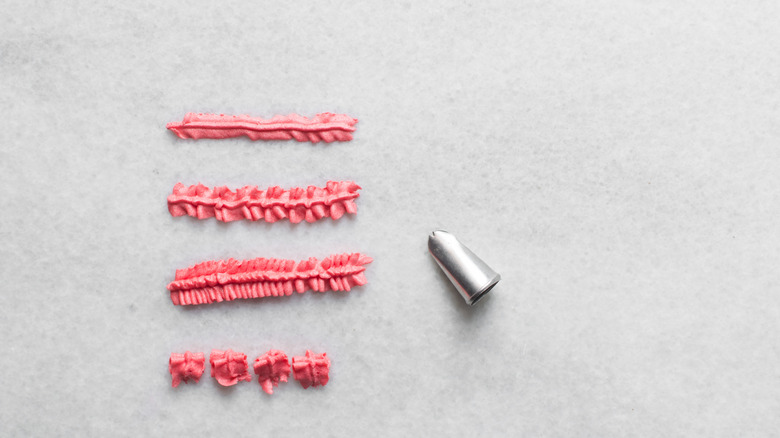
While rosettes are a great starting point for beginners looking to delve into the art of cake decorating, they're by no means your only option: There are a whole bunch of different patterns you can get started on once you've mastered the rosette. Finding your favorite often involves exploring different types of piping tip, Folsom explained. "Piping tips are classified by the shape the opening makes; round, star, ruffle, petal, leaf, etc. Within those groups, tips range in size and shape, so you can choose the size that best suits your decorating project."
You could try piping a zig-zag pattern around the base of your cake, for example, by "[holding] your piping bag at 45 [degrees] with the tip lightly touching the surface and steadily squeeze and glid[ing] the tip along the surface in an up and down motion." Then, "[c]ontinue piping up and down with steady pressure. To end, stop the pressure and pull the tip away."
Alternatively, why not accompany your rosettes with some buttercream leaves? To start, "hold your piping at a slight upward angle from the surface. The two points of the tip must be vertical (so that it looks like an open beak). Then, just "[s]queeze hard to form the base of the leaf, as you squeeze, slowly pull the tip slightly upward (this will give the leaf a little lift). Relax pressure as you pull away to form a leaf point. Stop squeezing before pulling the tip away."