How To Easily Debone Chicken Thighs

Deboning chicken thighs sounds challenging, but if you can wield a knife, you can definitely pull it off. While there are many cases where bone-in, skin-on chicken thighs are preferable, the bone can get in the way when making dishes such as fried chicken sandwiches, cutlets, curries, or stir-fries.
By doing this step at home, you are saving yourself money in more ways than one. Firstly, bone-in chicken is one of the cheaper cuts of chicken to buy simply because there is less work involved to get it packaged and for sale. Second, when you debone chicken at home, you can put those bones to use by making homemade chicken stock — essentially, you're getting two products for the price of one! Stash them in the freezer along with any stray vegetable scraps until you have enough to make a batch.
Just like when shopping for other chicken pieces, check that any visible fat or skin is on the white-to-yellow spectrum. A grayish hue is a bad sign. Also, look at the label to check that the sell-by date has not passed and also make sure that there is no added brine. But, if chicken thighs are close to their expiration date, they will probably go on sale, which provides a great opportunity to debone a significant quantity at once and store the rest in the freezer.
Gather the materials
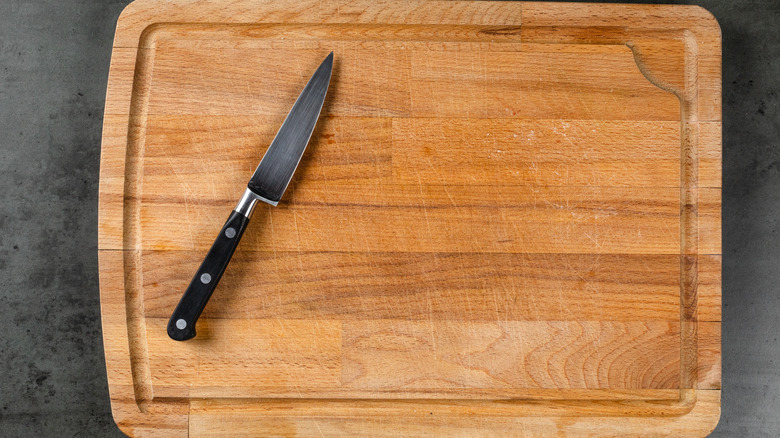
To debone chicken thighs, you will need a sharp knife and a cutting board, as well as paper towels, sanitizing solution, soap, and water for cleaning up afterwards. A boning, paring, or kitchen utility knife are helpful, but any knife you are comfortable using will work well. Whichever one you choose, do make sure it is quite sharp. When worn down, you have to push harder or hack at an ingredient, which increases the likelihood that you will slip and cut yourself. Plus, using a sharp knife allows you to glide through the meat with a smoother motion.
As for the cutting board, make sure you are using one that's dedicated specifically to cutting raw meat, which helps to prevent future cross-contamination. To keep cutting boards from slipping, just place a damp, thin kitchen towel underneath to increase stability.
Before you get to cutting, pat the raw chicken thoroughly with a paper towel until dry. This sops up contaminated liquid that can easily spread across surfaces, and it makes the chicken less slippery, so it's easier and safer to work with. Be sure to carefully dispose of the package it came in and the paper towels, and wash your hands thoroughly with soap and hot water.
Remove excess skin from the chicken thighs
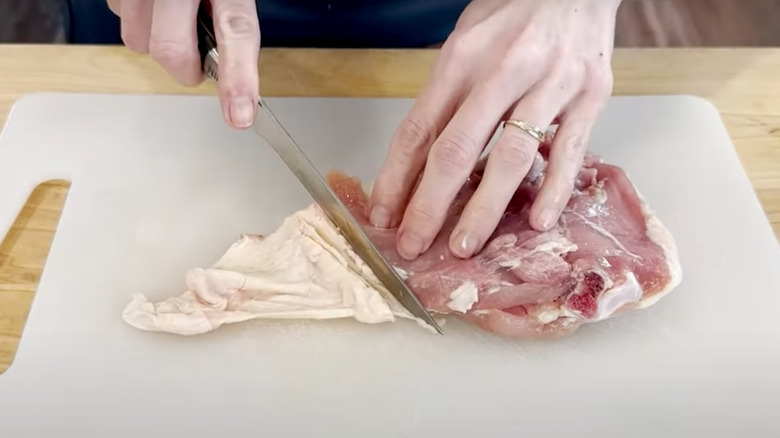
Flip the piece of chicken on its back so the fleshy side and bone are facing up. Most bone-in, skin-on chicken thighs will come with a fair amount of extra skin, so start by flattening out the piece and unfurling and stretching out the skin so you can get a good view. You will see that the meaty part tapers off as it connects to the flap of skin around the edge of the piece. Using the point of your knife and a downward pulling motion, slice off any excess skin. You'll want a piece of meat covered in roughly an equal-sized portion of skin.
If you would like, you can take it one step further and remove all the skin, but this is completely optional and often not necessary. If you choose to do so, you should be able to pull the remaining bits completely off with your hands, though you may need to use the knife to help you along or trim any stray bits of fat. Save that fat for an extra rich stock, or use it to make a crispy chicken skin, lettuce, and tomato sandwich.
Cut each side of the bone
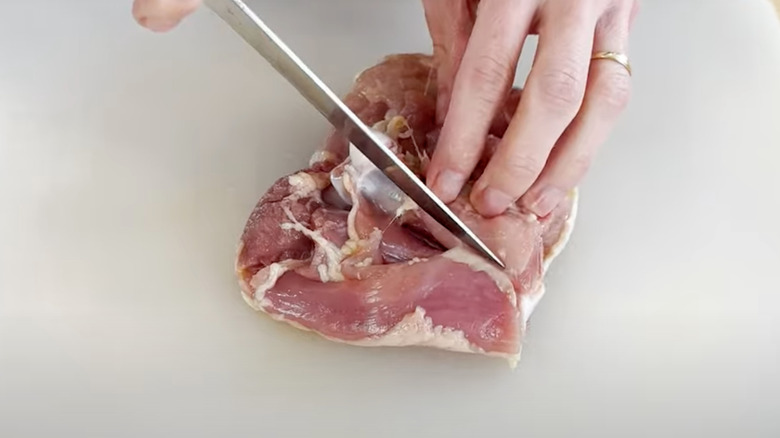
Whether you skin the chicken thigh completely or not, the deboning process remains the same. With the bone side facing up, use your fingers to feel around until you have a good sense of where the bone is. Run the tip of the knife along one side of the bone from rounded end to rounded end using short, repetitive cuts. This allows you to free the bone bit by bit without piercing the flesh of the chicken too deeply.
As you work, press the flat edge of the knife against the meat to pull it away from the bone. That pressure further separates the two components, and it gives you a clearer line of sight. Make sure to angle your knife towards the bone, so that you can cut as closely as possible. Since the bone is rounded, cutting straight down will leave a lot of meat behind. Repeat this process on the other side.
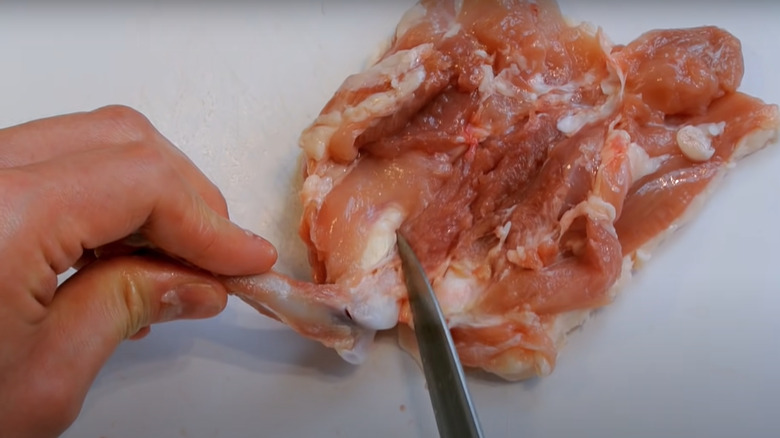
Pinch the bone and cut under it
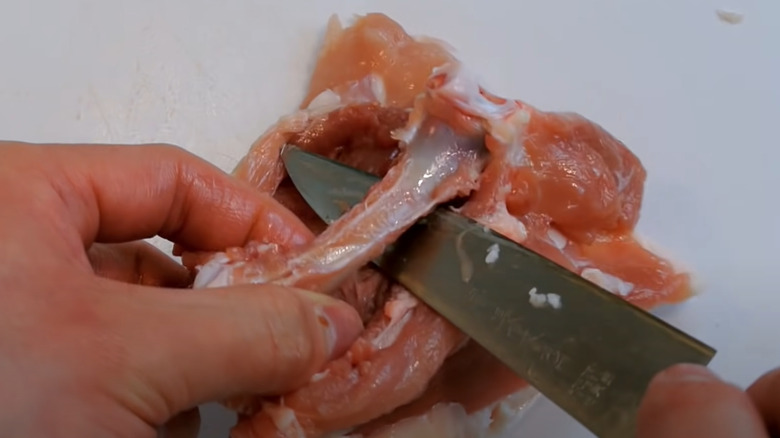
You should now have a clear view of the bone after separating the meat from both the right and left and the sides. Now, pinch the end of the bone itself using your thumb and forefinger. Direct the point of the knife at the underside of the bone with the sharp side facing away from you. Pierce the meat remaining underneath, and using a smooth slicing motion, cut away the flesh.
Because you held your knife at an angle while you cut along either side of the bone, the width of the meat that is still anchored should be quite narrow. Once you separate the meat there, the bone will only be connected at the two ends.
Slice away the cartilage
At this point, the only pieces that are connecting the bone and the chicken will be the cartilaginous ends. Pinching the bone on one side, position the knife under it with the blade facing away from you. Using the same outward cutting motion as you did to separate the meat from under the bone, slice the chicken away from the rounded end.
Then, pull the bone towards you, and use the point of your knife to cut away whatever bit of meat is still clinging on to the second cartilaginous end. You will be left with a perfectly deboned chicken thigh. When you're finished, don't forget to wash your hands, and clean and sanitize all surfaces and dishes!