9 Simple Ways To Take Your Omelet To The Next Level
When looking for a versatile, delicious dish that makes a great option for breakfast, lunch, or dinner, an omelet has to be near the top of the list. It is the perfect light option that somehow feels both satisfying and filling. However, for a seemingly straightforward dish, the omelet has a few pain points that can trip up even the most experienced home cook. From making sure it doesn't stick, to achieving the perfect fluffy texture, the ultimate, perfectly cooked omelet can feel elusive.
To help you take your omelet to the next level, I asked two experts for their favorite tips on how to best navigate this dish and make it extraordinary. Chef Gigi Gaggero, award-winning author and former academic director of the famed French culinary school Le Cordon Bleu, and Sarah Beth Tanner, eggspert at Pete & Gerry's, have plenty experience cooking omelets — and their secrets will help you reach the heights of fluffy omelet excellence.
From separating your eggs to choosing the correct pan, their expert advice will allow you to make a top-notch omelet for a relaxing Sunday brunch or quick midweek meal. Whether you're a seasoned home cook or a relative novice, these tips will definitely take your omelet skills to the next level.
Separate the yolks from the whites
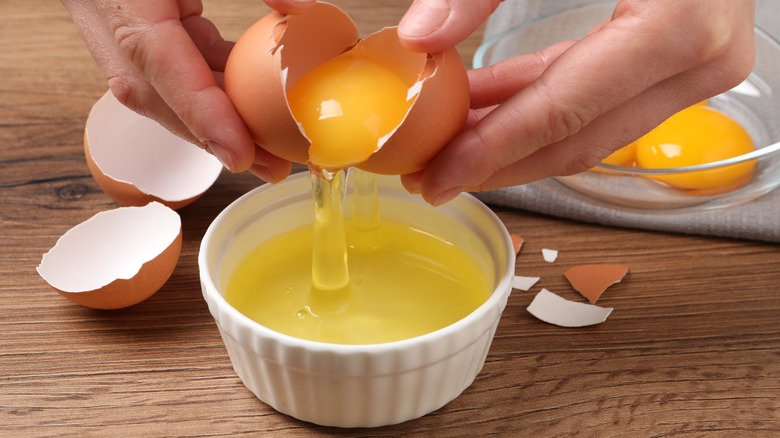
In your quest for the perfect omelet, you should be aiming for a beautifully fluffy texture. The first step involves separating the eggs into yolks and whites, something you may not have thought was important when making a simple omelet.
"There is only one way to make an ultra-fluffy cloud omelet — to use a technique similar to soufflé making by incorporating air into your ingredients!" says author Gigi Gaggero, former academic director of the famed French culinary school Le Cordon Bleu. "It's as easy as separating the yolks from the whites and gently putting them back together! You won't believe how fluffy your omelet is going to puff up!" If you're intimidated at the thought of separating eggs, there's no need. You may have heard that even the tiniest amount of yolk infiltrating the whites can be a disaster, but this only applies to technical baking such as meringues.
Cold eggs are harder to separate as the white won't be as runny as room temperature eggs, but the yolk is less likely to break, so for your first few attempts, cold eggs may lead to fewer broken yolks. To avoid shards of eggshell making their way into the bowl, tap your eggs on the cutting board rather than the edge of the bowl. This also reduces the chance of a broken yolk. You can then keep the yolk in the shell and let the white drip through, before transferring the yolks to their own bowl. It's then time for the next step — whisking!
Incorporate air into the eggs

Once your egg has been separated into yolks and whites, the next tip for a fluffy omelet is to get as much air into them as possible. The good news is your arms will get a workout at the same time, as you whisk both the yolks and whites vigorously.
"Whisk the egg yolks until they become homogenous and pale in color to almost ribbon stage — three to five minutes," advises author Gigi Gaggero. "Remember, the wider the whisk, the more air you can incorporate quickly."
Whipping egg whites fully can be physically challenging, so Gaggero suggests using some kitchen technology to get the job done more easily. Of course, you can still whisk them by hand, but be prepared to work hard.
"Transfer the unbeaten egg whites to a large stand mixer and whisk until they triple in volume and provide you with semi-stiff peaks," she suggests. This means that if you turn the whisk upside down, the peaks will mostly stand up, but the tops may curl back slightly.
Once both your yolks and whites have been fully aerated, Gaggero says, "Carefully fold the egg-beaten yolks into the egg whites until fully incorporated." You must do this gently or you risk losing the air that you worked so hard to get into the mixture. Fold in slowly with a spatula, rather than stirring with a spoon. The result will be a lighter-than air omelet that will be worth the hard work.
Choose the right pan

If you have made a few omelets in your time, you will know that choosing the correct pan is crucial. A stuck-on omelet is not fun half-way through cooking, so taking some time to select the right pan at the start will make things easier once you begin cooking.
Non-stick is an obvious choice if you want your final creation to slide elegantly out of the pan, rather than you wrestling with it, but there are many non-stick options to choose from. Teflon is the most common and widely available, but older pans (pre 2015) can cause the toxic compound PFOA to be formed during cooking. Even new pans can be dangerous if they get scratched just once, causing microparticles to leach into the food.
Ceramic pans are a safe option, and one favored by Sarah Beth Tanner, egg expert with Pete & Gerry's. "I like a ceramic-coated non-stick pan with low sides and a wide, flat base," she explains. The low sides on the pan will make it easier for your omelet to glide out of the pan and reduce the chance of breakage. No matter what type of pan you opt for, it is worth investing in a good quality pan and taking care of it to ensure it lasts you for years, and hundreds of delicious omelets.
Use high-quality eggs

One factor you may not have considered is how the quality of the eggs you buy can impact the flavor and texture of the final dish. All eggs are not created equal, and the way the animals are treated can have a big effect on the quality of the eggs.
"There isn't any need to add milk or water when you're working with high-quality eggs from free-range or pasture-raised hens, like Pete & Gerry's and Nellie's," says egg expert Sarah Beth Tanner. "Our superior egg whites and yolks fluff up beautifully with no additional ingredients."
Free-range eggs come from chickens that are not kept in cages and have access to the outdoors, while pasture-raised hens live a life as close to their natural environment as possible, eating natural food rather than processed feed, and they get exercise too. The difference in a living environment for free range and pasture raised hens inevitably costs more, meaning the eggs have a higher price tag, but the difference will be clear when it comes to taste in your omelet. "The type of eggs you use will make a distinct difference in taste and texture!" confirms Tanner. Flavor starts in the shell, and eggs from free-range and pasture-raised hens ... are much more flavorful with rich, creamy, golden yolks. Those are differences you can clearly see and taste."
Cooking fat: butter or oil?
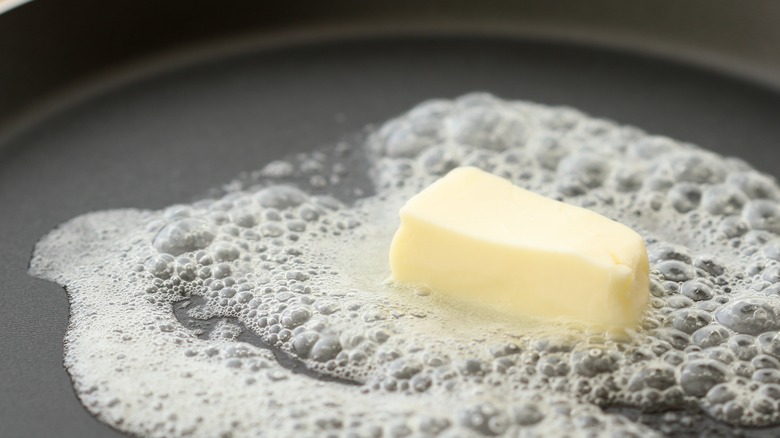
Once you have the correct pan and the best quality ingredients for your superstar omelet, it's time to prepare the pan by coating it with a little fat, but the big question is — oil or butter?
Butter is a great option if you want to add rich flavor to the omelet, as well as the signature golden outside. Butter has a fairly low smoke point of around 300 degrees Fahrenheit, which should be fine if you are cooking your omelet on a low heat, but be aware that it could burn if you crank up the temperature. "If the butter sizzles when it hits the pan, turn the heat down!" advises Sarah Beth Tanner of Pete & Gerry's. "You want gentle heat to keep the omelet from browning."
Vegetable oils, on the other hand, tend to have higher smoke points, meaning they will cope better with increased temperatures. Using oils with a strong flavor such as coconut oil or avocado oil will impart a unique taste to your omelet, so make sure you are happy with that before selecting an oil. Canola or sunflower oils have a fairly neutral flavor if you want the taste of the egg to shine through.
"I always cook my omelets in butter because I love the flavor, but oil works just as well!" explains Tanner. "Be sure to add whatever fat you're using after the pan has had a chance to heat up slightly. This will help keep your omelet from sticking."
Use gentle heat and stirring for a perfectly set omelet
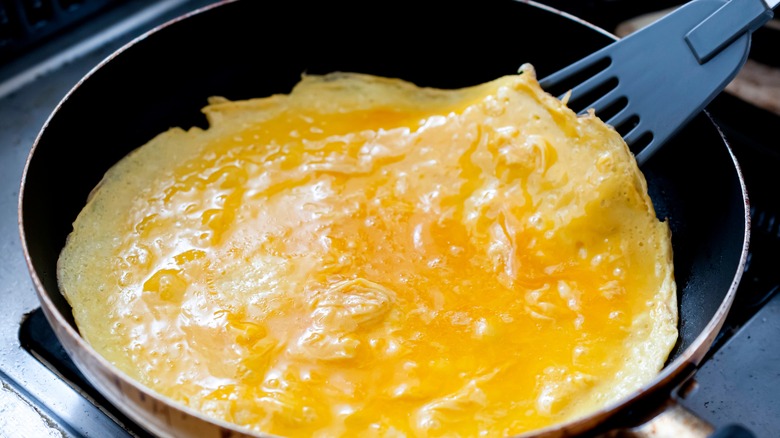
Cooking the omelet doesn't take long, but a few well-timed touches can help you master technique. Don't be tempted to crank up the heat and stir vigorously — so gently does it on both counts.
"Pour the egg mixture into a warm, medium-sized, nonstick frying pan with a lid," advises author Gigi Gaggero. "Cook over medium-low heat until the bottom of the omelet has set, about 3-5 minutes." Gaggero also has an ingenious tip to keep the pan lubricated as the eggs are cooking. "Lift each side of the omelet and drop a tablespoon of butter under to keep it from sticking. Cover the pan and cook for 3-5 minutes until the top of the omelet has set."
When it comes to agitating the omelet, a little at the start is fine, but don't continue to stir as it cooks — it's not a risotto you're making. Your eggs will be well whisked from the first few steps, so now is your chance to relax and watch as your omelet sets perfectly.
"You can stir a bit at first," says Sarah Beth Tanner, egg expert with Pete & Gerry's, "but once most of the liquid has turned into small, semi-set curds, stop stirring and allow the bottom of the omelet to set fully."
Folding the omelet
Now that the first side of the omelet is beautifully cooked, it's time for the bit that we all worry about messing up — the fold. This is the crucial point in omelet mastery: Get it right, and you will have a silky omelet that's going to look elegant on the plate. Get it wrong, and you will have a scrambled mess stuck to the pan. The key is to be patient, and never try to fold the omelet until the bottom is completely cooked. You can peek underneath with a spatula, but don't be tempted to flip prematurely.
"Once the egg mixture is fully cooked on the bottom of the pan, gently loosen the edges with a rubber spatula," Sarah Beth Tanner, Pete & Gerry's, suggests. "You can go American-style, and fold one half over the other (I find this to be the easiest to execute), or you can get fancy and French and fold the omelet by rolling it gently in three sections towards one edge of the pan and then out onto your serving plate."
If you are new to making omelets, American style is probably the best option to keep things simple, and will still make an eye-catching dish. If you are looking to up your omelet game, however, give the French fold a try and see how it turns out.
Add unusual ingredients
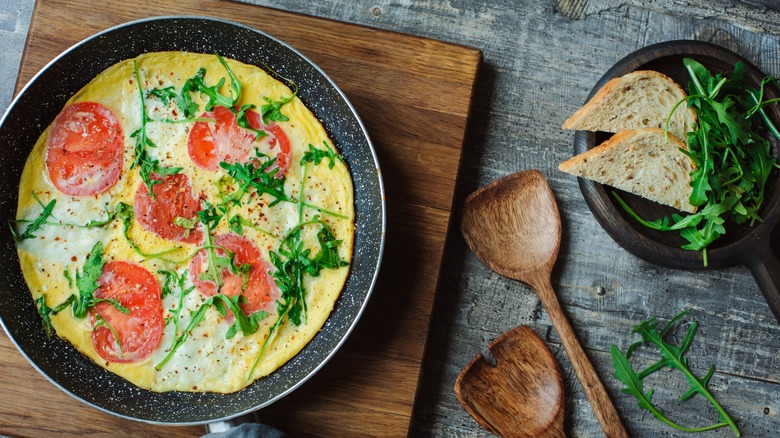
Once you have mastered a basic egg omelet, you can start having fun with them and creating midweek meals that change to suit your mood. Common additions include cheddar cheese or mushrooms, but you can get creative and come up with your own signature fillings.
"I've experimented with a wide variety of veggies, cheeses and sauces. You can't go wrong!" says egg expert Sarah Beth Tanner. "My favorite omelets are usually one-of-a-kind creations using whatever leftovers I have from a dinner out."
For a classic option that will keep most of the family happy, try this Western omelet that combines peppers, ham, and onions to create a savory delight. Or switch out the ham for a different protein — leftover chicken or pulled pork work nicely. For a light summery option, go for a Mediterranean omelet with spinach, tomato and feta. Cheese and omelets were made for each other, so if feta's not your thing, brie or creamy goat cheese can add wonderful umami notes.
If you want to add a little more spice to your eggs, an Indian omelet with cumin, chilis and cilantro will keep your taste buds dancing. A mixture of fresh and dried spices and herbs will create layers of flavor to make sure your omelet is anything but boring. Whatever fillings you choose, take advantage of the versatility of an omelet and don't be afraid to experiment with different flavors.
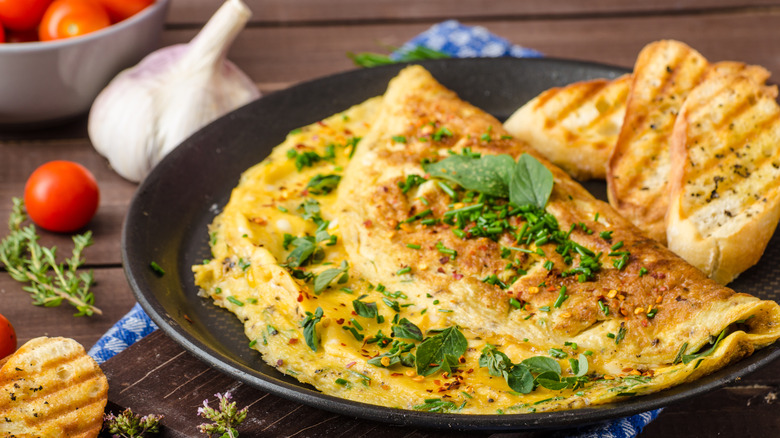
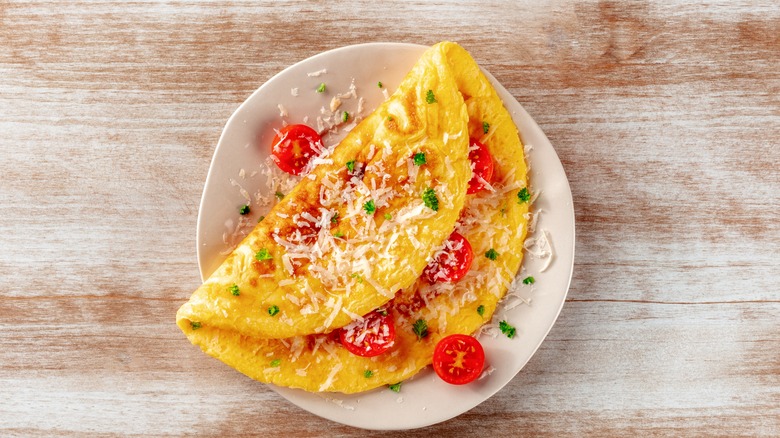
Elevate the presentation
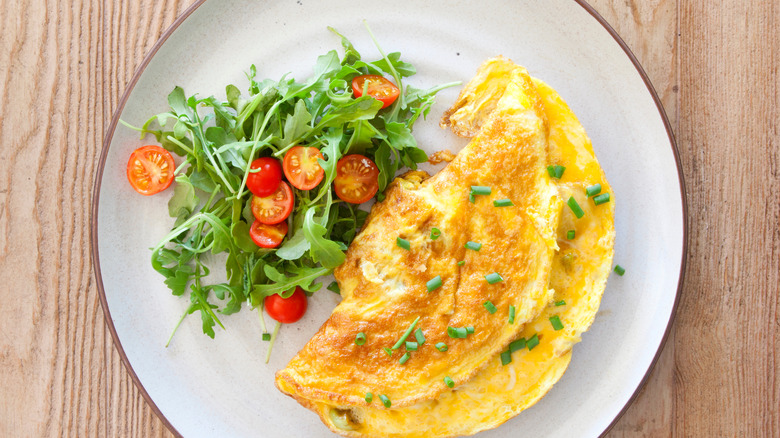
Once you have finished cooking your egg masterpiece, it's time to present it to the world — or at least your family or friends. You want them to appreciate the time and effort you have put into making the best possible omelet (with help from our experts) so it's crucial to take a few minutes to polish your presentation.
"When it comes to presentation, garnish is everything," says Sarah Beth Tanner of Pete & Gerry's. "Be sure to have some chopped fresh herbs or shredded cheese to sprinkle (or pile!) on top." Fresh herbs are the perfect garnish as they take little time to prepare — they also add a pop of color, and lift the omelet with some fresh flavor. Chives and parsley are classic options that will suit whatever filling you've added. If you have added fish to the omelet, dill is an excellent pairing.
Don't discount the possibility of drizzling a spoonful of something delicious over the top of the omelet either. "I also love a saucy omelet," says Tanner. "I highly recommend a ribbon of pesto or a spicy harissa pepper sauce right over the top." These unusual garnishes will have the dual benefit of looking amazing while acting as an additional layer of flavor to the dish.
Gigi Gaggero, award-winning author and former academic director of the famed French culinary school Le Cordon Bleu, likes to keep presentation simple and elegant. "By tipping the pan and knocking the handle, roll the omelet onto a plate. Think, bottoms up! Garnish with lots of fresh-cut chives and dollops of creme fraiche!"