How To Prevent Ice From Forming On Homemade Ice Cream
There's nothing worse than crafting the perfect ice cream flavor and then losing some of the batch to freezer burn as soon as you retrieve it a day later. While freezer burn shouldn't send you immediately running to the trash, it's annoying to remove and definitely affects the vibe when you reach for the pint and a spoon. Luckily, a simple way to keep freezer burn off your freshly made ice cream is to seal it using plastic wrap, parchment paper, or wax paper.
Of course, there is some debate over the best choice. Speaking to the Martha Stewart website, cooking teacher and private chef Joseph Pace suggested against using plastic wrap (he suggests waxed freezer paper), while Ben & Jerry's says all three options can be effective at keeping your ice cream freezer burn-free. Regardless of the choice you make, you'll need to make sure you're properly wrapping your cold treat.
Sealing your ice cream
Sealing your homemade ice cream is effective no matter how you choose to store it — whether it's in a specialty ice cream container, freezer-safe plastic container, old ice cream container, or loaf or pie pan. If you have wax paper or parchment paper in your pantry you can cut a sheet — or even cut a round piece of it — and press it tightly onto the ice cream itself before putting the lid back on it (if you're using one). This will keep the ice cream sealed against the condensation that could form if the ice begins to evaporate. Equally handy is a sheet of plastic wrap, which you can similarly press tightly to the top of the ice cream. If you really want to ensure that your ice cream remains protected you could try layering both materials for an extra tight seal. This is especially applicable if you're storing your homemade ice cream in something without a lid, like a pie or loaf pan.
To add another layer of protection, keep your ice cream away from the areas of the freezer where the temperatures will fluctuate the most when it's opened. If you have a drawer freezer, bury your ice cream at the bottom of the drawer. If you have an upright freezer, keep the food away from the freezer door storage areas. With your ice cream well protected, you can ensure that it will last until it's eaten.
How freezer burn occurs
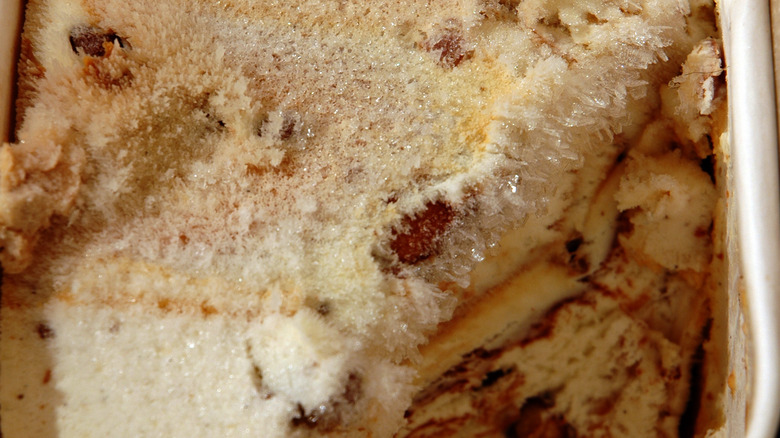
Opening your delicious homemade ice cream to find a layer of snowy, icy crystals is a true bummer. You might think it's unavoidable, but the truth is that freezer burn happens for a reason, and there are ways you can curb it.
Freezer burn occurs when the ice in your ice cream begins to evaporate. When this moisture combines with the dry air in the freezer it refreezes and creates the snowy, icy layer on the top of your ice cream. Depending on how much of the moisture has evaporated and re-frozen, you could be met with a thin layer of ice crystals — or a very thick one. There's nothing dangerous about consuming this freezer-burn ice, but it can be a little bit icky if you're looking for the smooth, silky texture your ice cream originally had.
Some experts suggest that you can prevent freezer burn on ice cream by making sure your freezer is as cold as it can possibly be. As cold as zero degrees Fahrenheit if you can swing it. You can also try burying your ice cream in the lowest part of the freezer behind or underneath other cold items. The colder the ice cream stays in its container, the less likely it is to develop these ice crystals.


