Everything You Need To Know About Cooking Whole Chicken
Food Republic's column Ask Your Butcher seeks to answer FAQs in the world of butchery. Ethically minded butcher Bryan Mayer founded Philadelphia's Kensington Quarters and helped develop a renowned butcher-training program at Brooklyn's Fleisher's. Today, he consults with farmers, chefs, butchers and anyone else who will listen. In each column, Mayer tackles a pressing issue facing both meat buyers and home cooks. Here, he explores the different ways to cook a whole chicken.
I have a slight confession to make. I used to really dislike chicken. This was not always true. In my darker days, I had a slight addiction to the juicy, crispy, savory wonderfulness that is Popeye's fried chicken. And steamed chicken and broccoli got me through my college years when I thought I was being "healthy." So what did it for me? What took this potentially delicious food, easily prepared in so many different ways — fried, roasted, grilled, spatchcocked, beer-canned, suspended from strings whilst twirling around a fire as if on an amusement park ride — and ruined it for me? Four words: boneless, skinless chicken breast!
It is not so much that boneless, skinless chicken breast is the root of all evil. Hardly. But it is the relegation of the rest of the bird to the culinary equivalent of the sneaker bin. There is so much value and flavor in cooking a whole bird. And while chicken breasts can be delicious — especially with those wings attached, the bone intact and the skin on — you have got all that fatty, dark meat of the thighs and legs to add richness and depth of flavor. Cooking a whole bird can never replace the efficiency of a 20-minute-and-done boneless, skinless chicken breast...if you are eating just to feed the machine — call it the equivalent of a lit major reading the SparkNotes. If you are eating for pleasure, however, it is better to take the extra time and get the full version. Let's break down three different ways to cook whole chicken.
Roast Chicken
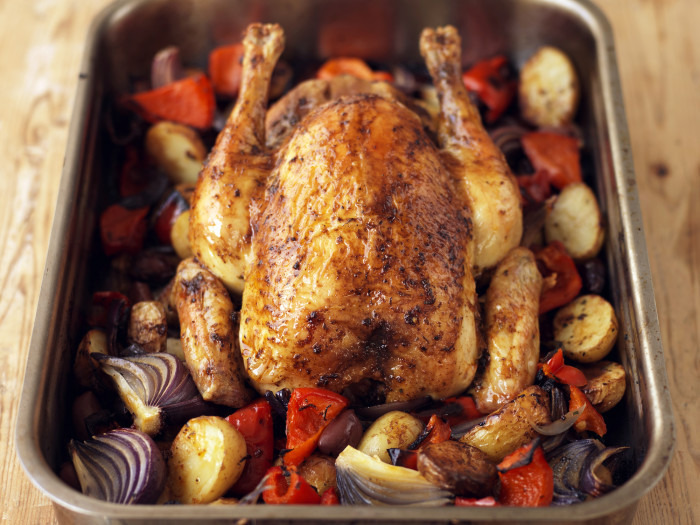
The simplest way to cook a whole chicken is to roast it. Roasting will take more than double the time — roughly an hour — of cooking a chicken breast, but there is little else to it than turning your oven to 400°F and walking away. You can bring that time down slightly by increasing the temperature to 450°F, but you will want to have a meat thermometer handy (more on that below).
There is one caveat here: How do we get those breasts and wings and those legs and thighs to be done at the same time? You cannot. But you can help your cause a bit by trussing, which any good butcher will know how to do properly. I am not talking about tying the legs together and folding the wings under the back here. You need to tuck and lift those breasts, which will make for a more compact, "thicker" breast area, which will increase cooking time and allow for more even cooking. You can wet or dry brine, and either method will help, but it is definitely not the best way. If time is of the essence, rub your trussed chicken with some olive oil, salt and pepper, and toss it in the oven. And to all those folks I used to tell to stick pats of butter between the skin and the breasts, I am sorry — that really does not work. I am always learning!
Spatchcocked Chicken
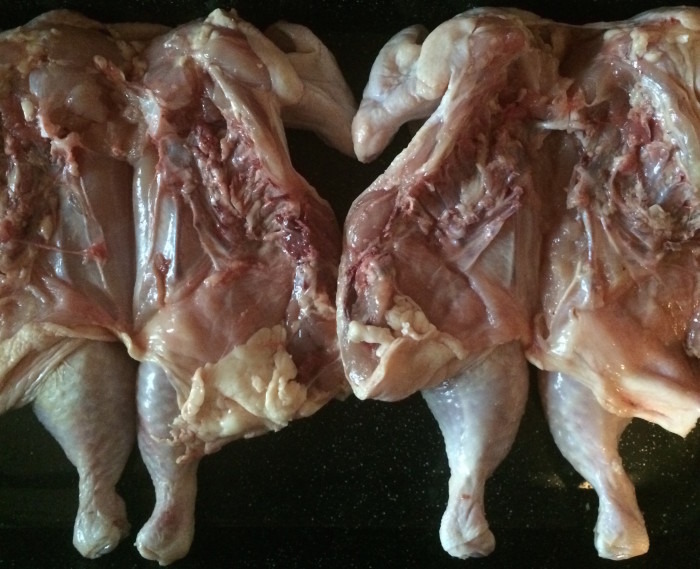
The optimal way to cook a whole bird requires a little more work (recipe below). You may have heard me and many others talk about spatchcocking a chicken — that is the way to go! You can have your butcher remove the backbone, but why should they have all the fun? All you need to do is cut right down either side of the spine with a good pair of kitchen shears. Do not toss the bone — roast it with your chicken and use it to make a great sauce or add to your bones for stock.
The idea with cooking a chicken flat like this is that you even out the cooking process. Remember all that stuff about cooking a bird to 165°F and the juices running clear? Well, forget it. And this time both science and the USDA agree. You can cook your chicken breasts to 150°F. In fact, you should do just that or you will get a shriveled, dry mess that nobody wants. You will still want to cook your thighs and legs to 165°F, but they were never really the problem with all that fat and collagen to keep them juicy. You will know these exact temperatures, because by now you have gone out and purchased yourself an instant-read thermometer. I season my bird the same way as above, with oil, salt and pepper. One 400°F oven and around 45 minutes later, you have got a perfectly cooked chicken.
Fried Chicken
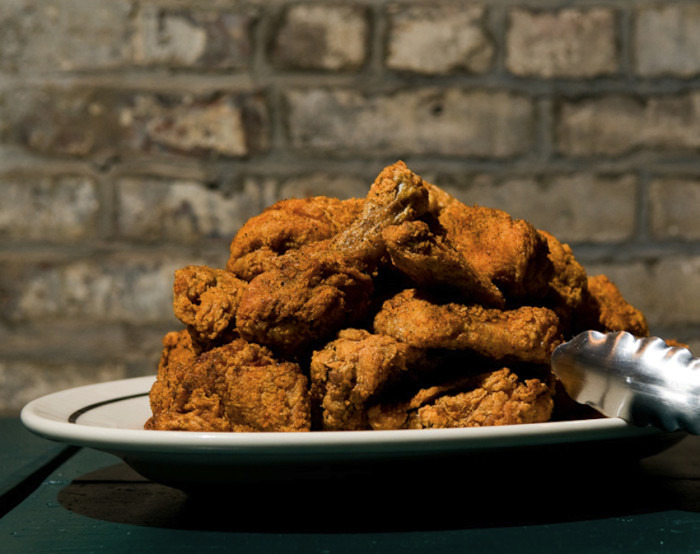
A real personal milestone in regard to chicken came at the beginning of 2014. My restaurant and butcher shop had experienced yet another delay in opening. While you have got some leeway with cattle and pigs, chickens are a little more time-sensitive. Fully pastured birds can take up to three times as long as their industrial counterparts to get to weight, and during that especially cold winter they were taking a bit longer. Unfortunately, we were nowhere near close to opening and our first group of chickens was ready. I could have frozen them to use at a later date, but I did not want to do that. The solution? A fried chicken pop-up. What better way to move 400 chickens? For three weeks, the chickens were broken down, soaked in buttermilk, fried in animal fats and then baked. It was a huge success, and thus began my crispy, salty coming-to-peace with chicken.
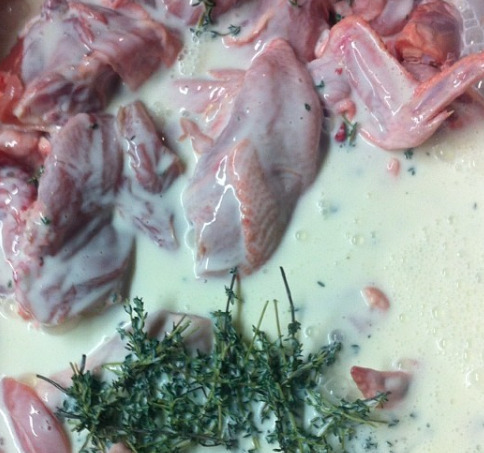
Of course, you do not need a restaurant kitchen to create great fried chicken. Much has been written about the proper ways to fry chicken, and with the secrets of how Chick-Fil-A does it all over the Internet, you can easily fry at home. But first you must get the soak and the coating right! I will say that buttermilk is the way to go — I am not really going out on a limb here, as Southern cooks have preached this forever. With its combination of acids, enzymes and calcium, buttermilk not only tenderizes but adds flavor. A 24-hour (refrigerated) soak is all that is required. If you are looking to add more flavor, season the buttermilk as you wish. I like using sprigs of fresh herbs, but almost anything will do — play around with different combinations.
The coating — just like the soaking — is all personal preference. I like the double-dip method of a dredge in flour, a dip back in your buttermilk and a final dredge. But there are alternative methods, like adding cornstarch and baking powder and dredging just once. This is fried chicken, and there is no wrong way! Actually, there is one wrong way — stay away from shortenings. Let us fry our chicken in healthy, clean animal fats. Some like to cut with peanut oil, but I like a mix of beef and pork fat (in a pinch, stick with just pork). The richness of only beef fat tends to overpower the flavor.
We will employ the same cooking temperatures here as we did above — 150°F for breasts and 165°F for legs. However, we will not straight fry them. We will get our oil to about 400°F or so, in order to allow for a temperature drop as we begin to add our pieces. I like a range of 300°F – 350°F. Get both sides nice and brown, and then place into a preheated, 350°F oven until the pieces come to temperature. I dare you to resist eating right then and there, but you can always refrigerate for 24 hours and then quickly refry the next day for the double-fry method.
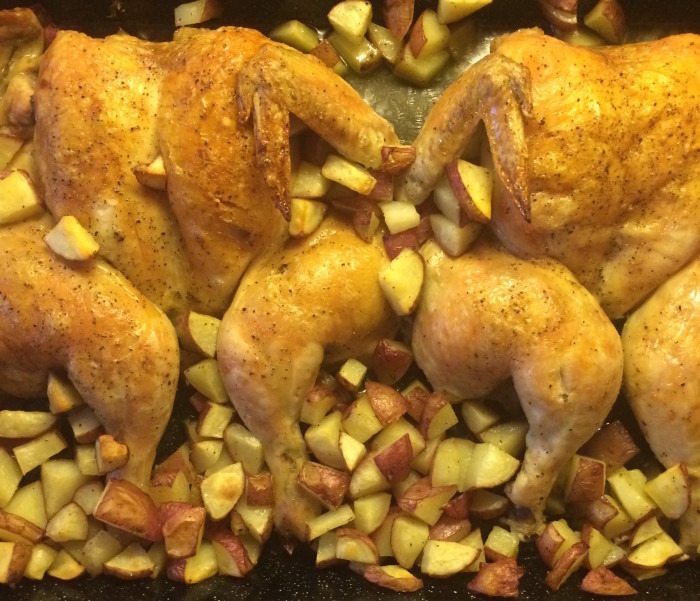
Spatchcocked Roast Chicken With Veggies
Servings: 2-4
Ingredients
1 large chicken — look for the largest you can find. You can find fully pastured birds around 5 pounds during the late summer months into early fall.
2 tablespoons of olive oil
Salt and pepper
A handful of vegetables — new potatoes, carrots, green beens. Whatever you like and is in season.
Directions: