A Step-By-Step Guide To Cutting A Whole Chicken
[Warning: The following article contains several graphic butchery photos. Viewer discretion is advised.]Food Republic's column Ask Your Butcher seeks to answer FAQs in the world of butchery. Ethically minded butcher Bryan Mayer has opened butcher shops and restaurants and has trained butchers in the U.S. and abroad. He helped develop the renowned butcher-training program at Fleisher's. Today, he consults with farmers, butchers, chefs and anyone else who will listen. In each column, Mayer tackles a pressing issue facing both meat buyers and home cooks. This week, he shows us how to properly break down a whole chicken.
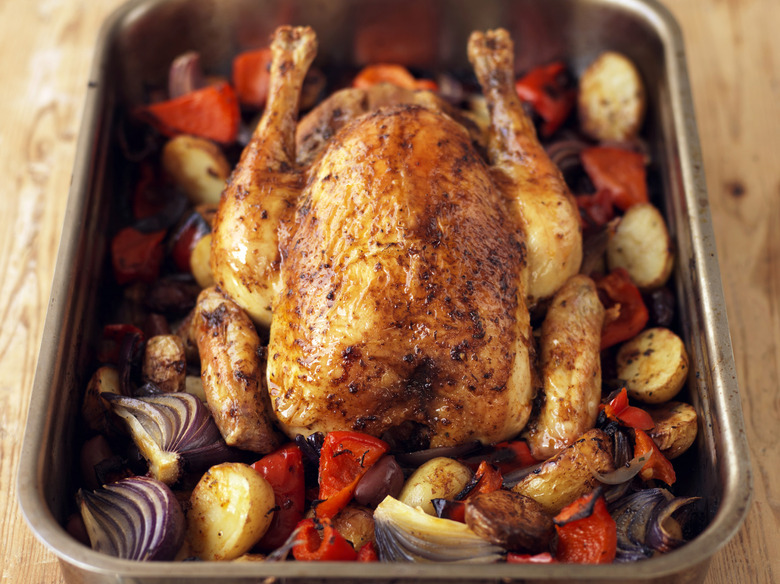
A few months back, we talked about cooking chicken — whole chicken, spatchcocked chicken and chicken cut up for frying. But as the headline might suggest, there should be a bit of butchery here as well. Roasting a whole chicken is about as low maintenance as you can get: a rub of some oil, a few spices, a 400° to 450°F oven and you're all set. But what if you're looking for something a bit more sophisticated? A cacciatore, perhaps an untraditional coq au vin (minus the rooster), or my personal favorite, chicken adobo.
Regardless of your choice, you're going to need a cut-up chicken. And why let the butcher have all the fun? Through the years, my whole-chicken classes have by far been the most popular. I think that's because it's familiar. We eat a lot of chicken, and it's the easiest way to make whole-animal cookery a part of your routine. Now, I don't expect you to pull a Jacques Pépin, and with a mere twist of your wrist and a flash of your knife, there before you is a chicken cut up into pieces. Nor do I expect you to hail the way I cut up a bird as the definitive, best, or only one you'll ever need. It is, simply, a way — one of hundreds of ways to cut up a chicken. It is one that I've found to be quick and precise, which comes in handy when they are ten deep at the butcher counter. So sharpen and steel your knives, and grab yourself a free-running, fully pastured bird!
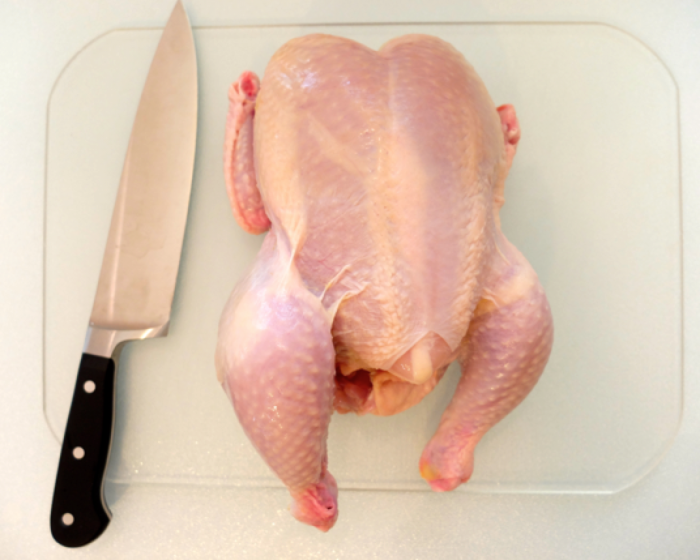
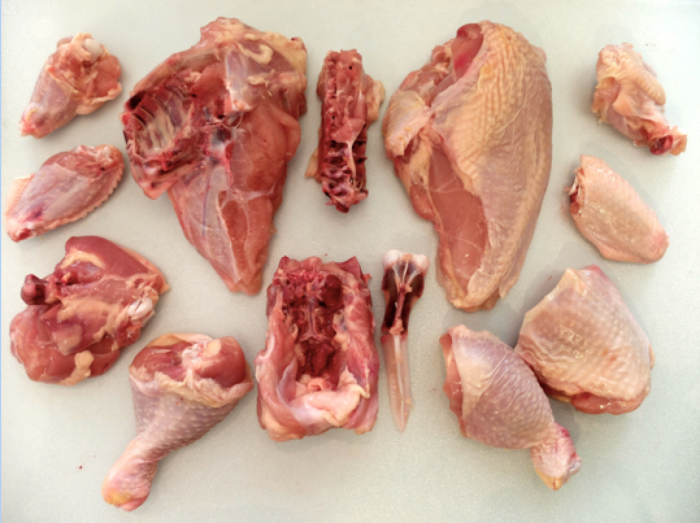
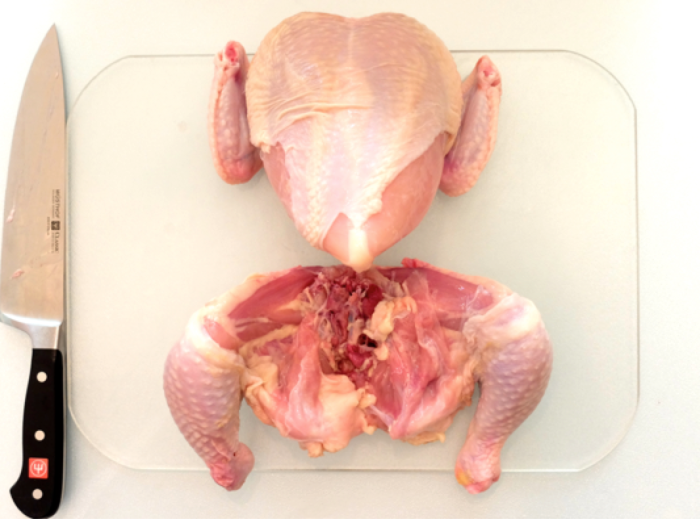
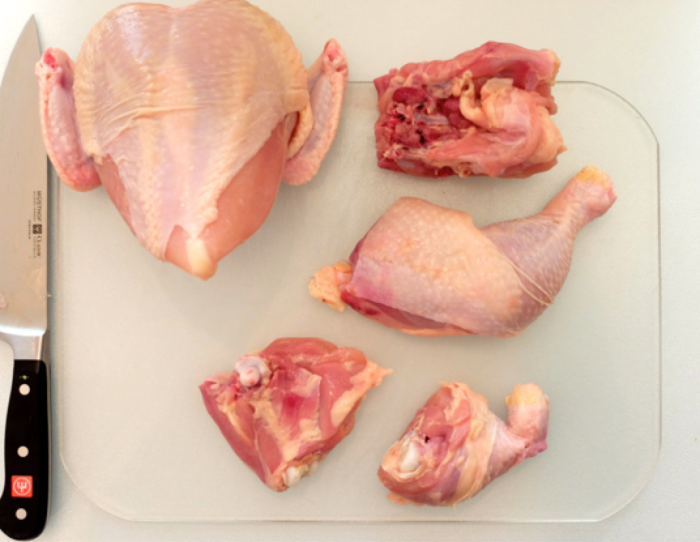
Here we go! One free roaming, fully pastured chicken, and a really sharp knife. You may notice that the wingtips (metacarpus) have been removed. That was just the luck (or, rather, unluck) of the draw when I picked my bird up from the farm.
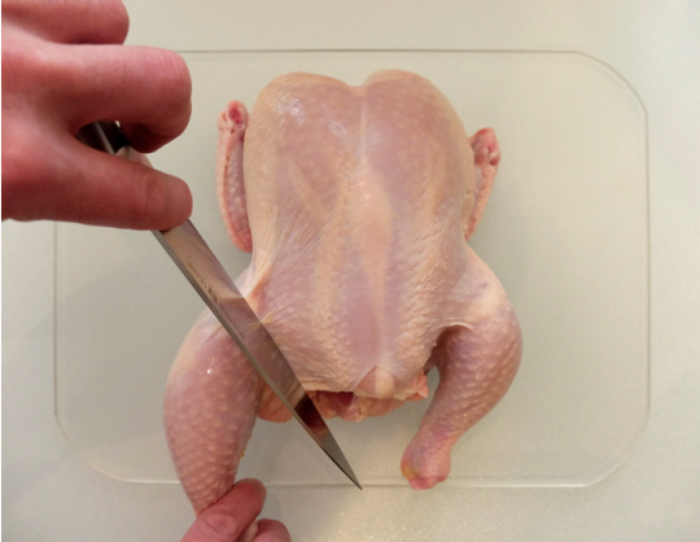
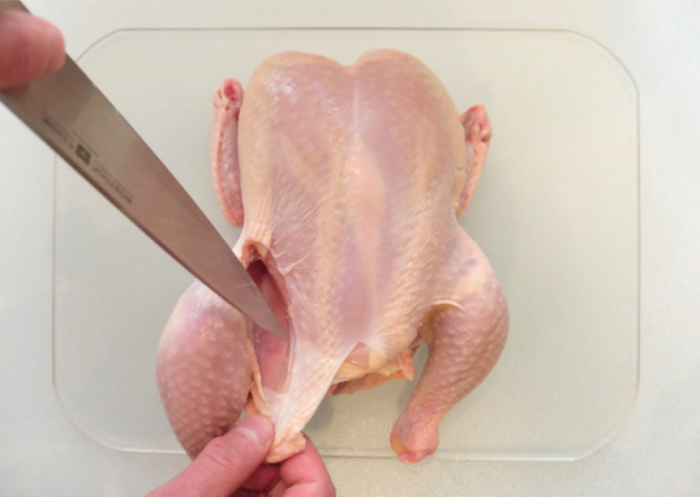
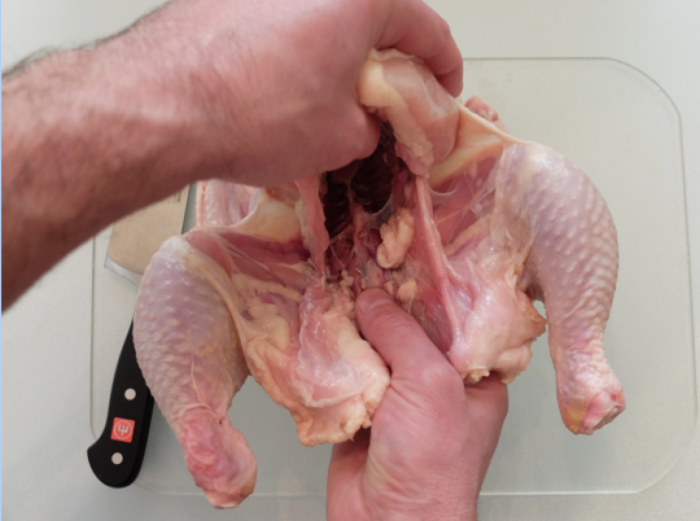
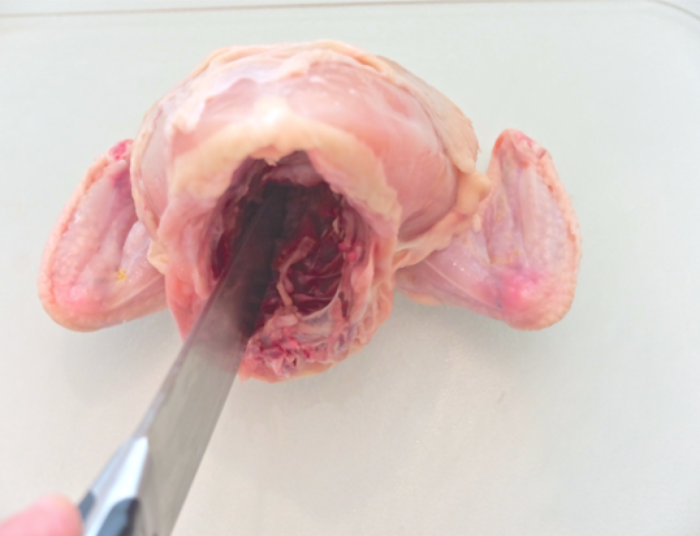
With your knife placed between the leg and the breast, cut through the skin until your knife comes in contact with the backbone and you've exposed the cavity of the bird.
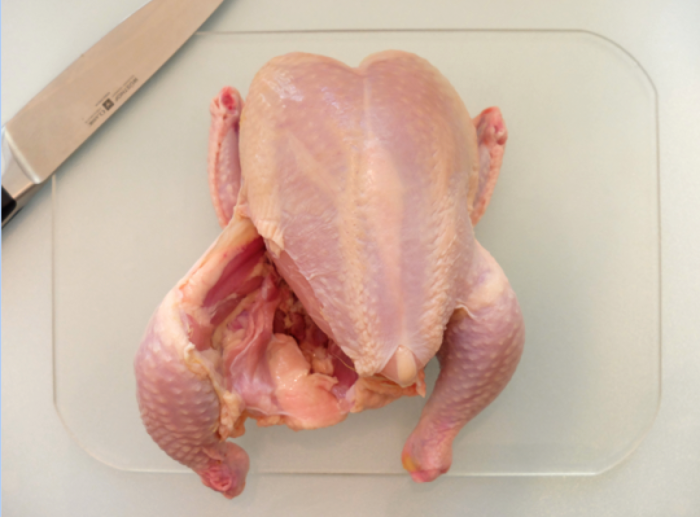
Now simply repeat the step above for the other side, cutting through the skin between the leg and the breast, down to the backbone, exposing the cavity.

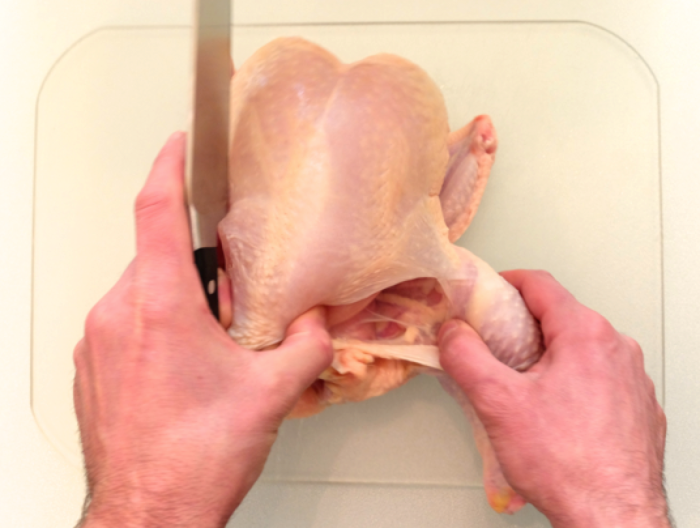
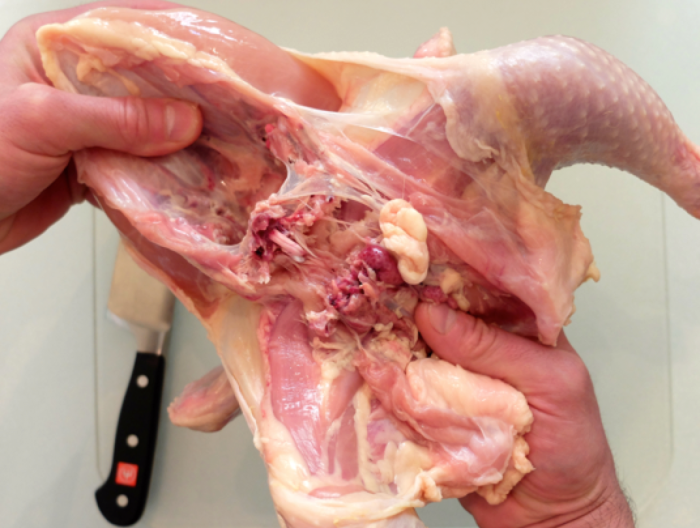
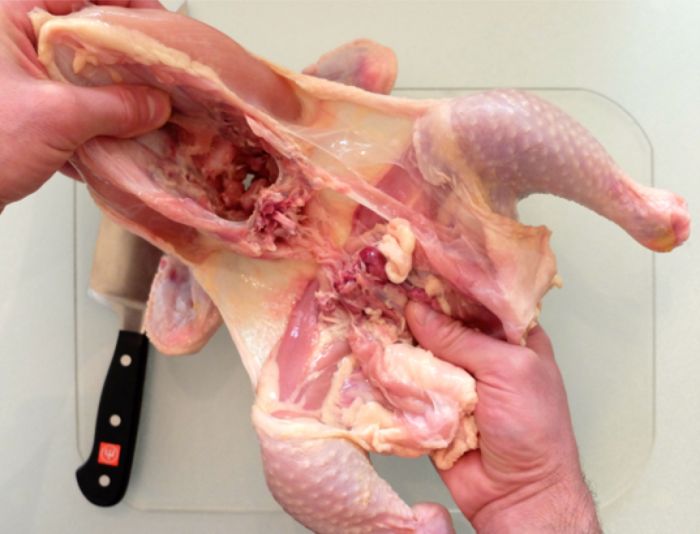
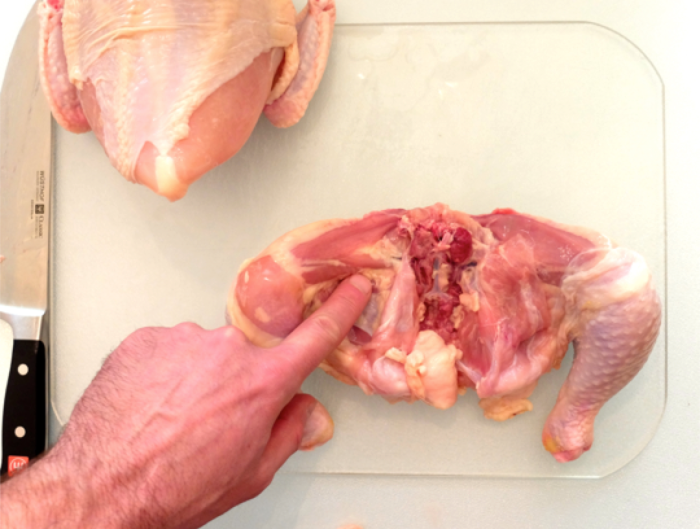
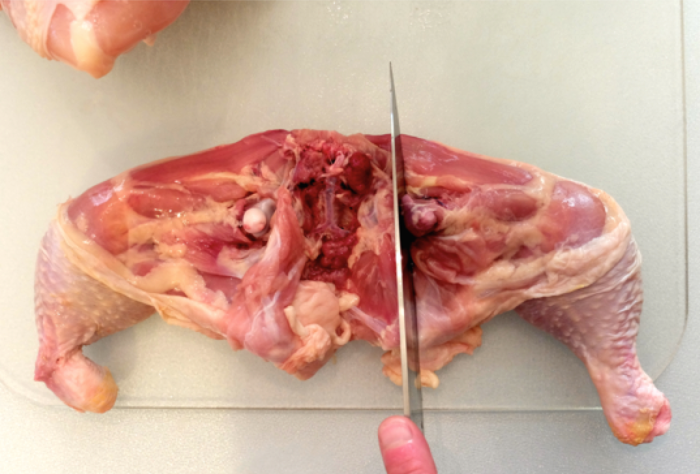
Now for the fun part. Holding the chicken with your thumb on the backbone and your other thumb inside the cavity pressing against the keel bone (sternum), snap the two sections in half. That's right, sever the spine between the lower and upper half of the bird. It should be fairly easy to do. Make sure you sever completely and that the only thing holding the two sections together is the skin.
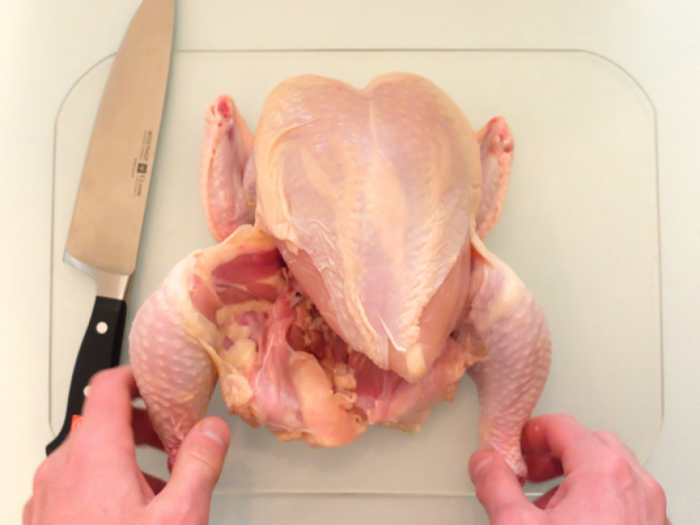
Place your bird back on your cutting board. With your knife, sever the two sections.
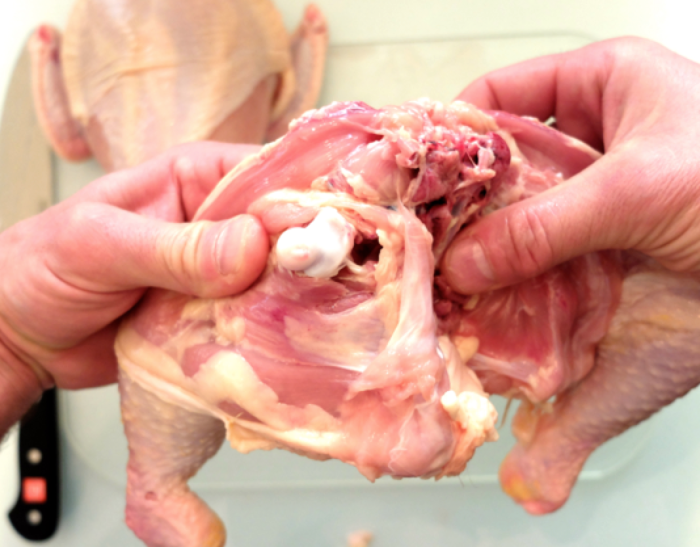
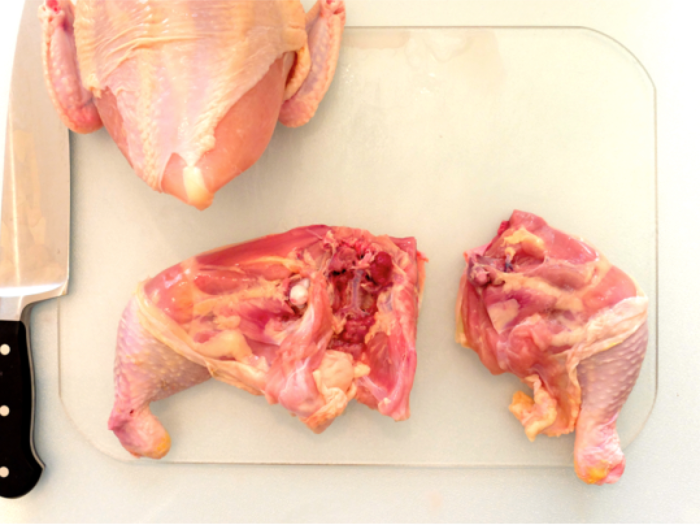
Now you've got two perfect halves. Let's continue working with the leg, thigh and back. Locate the thigh bone (femur) in the thigh, which is usually surrounded by a strip of fat.
With your thumb on the backbone and your other thumb on the thigh bone, push the femur from the skin side, popping it out of the hip socket.

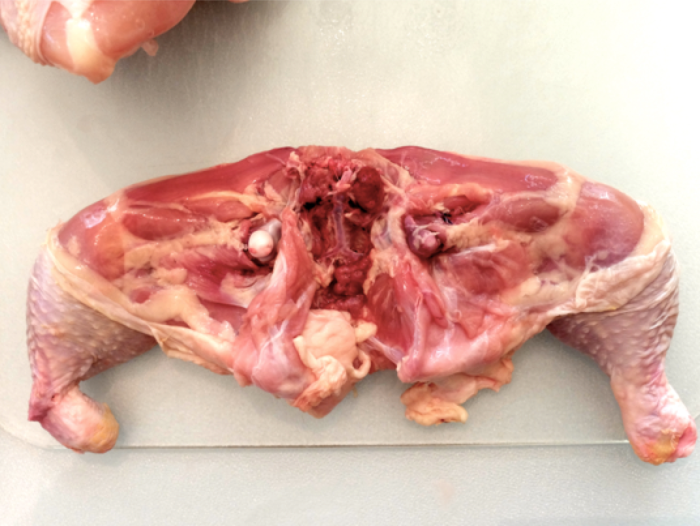
Repeat the above steps for the other side, with the results looking something like this.
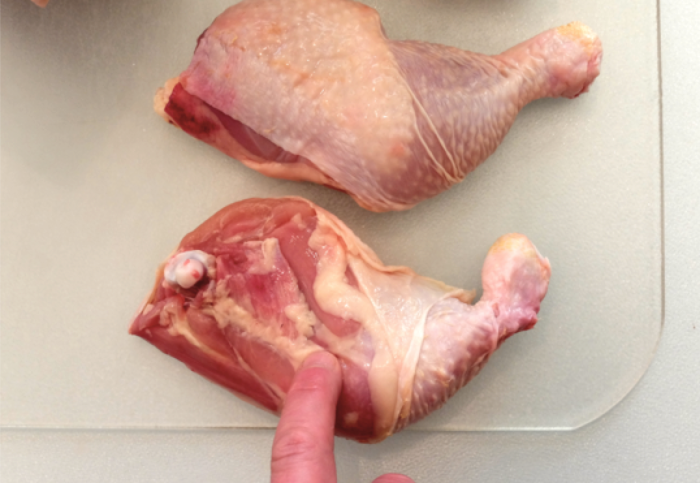
With your knife between the exposed femur and the illium (one of bones in the hip), slice through, severing the thigh from the back. Yes, I know, I cut right through the oyster (that round piece of dark meat on the back near the thigh — one of the most delectable parts of the whole bird). Most of it is still on the back. Besides, it never makes it to the table in my house.
Repeat the above steps for the other side. Once again, cut right through that oyster.

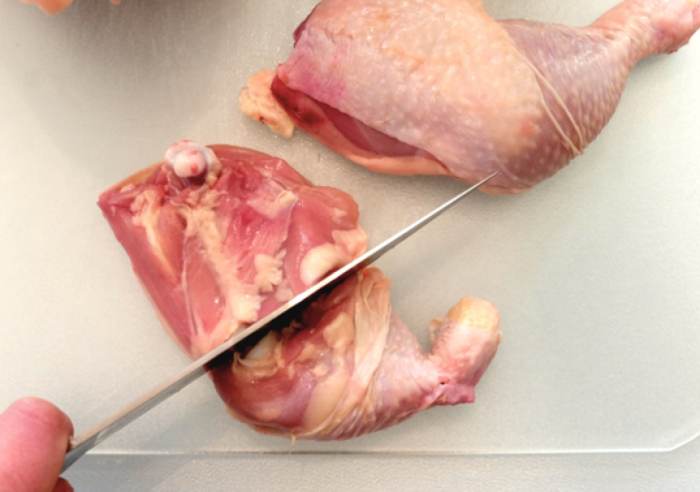
Just one more cut and we're done with the lower half. Locate that strip of fat that lays on top of the femur and trace downward toward the leg bone (the tibia). You should feel a joint, the hock or stifle joint. That's what you're looking for. Place your knife in the middle of this joint between the femur and tibia and cut down. If you're finding it difficult to cut through, you're probably trying to cut bone, which is not going to happen. Wiggle your knife until you can feel the separation in the joint.
And repeat for the other side.

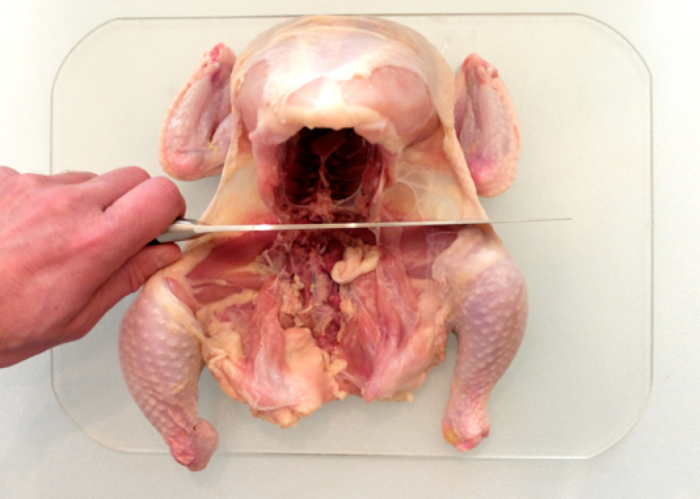
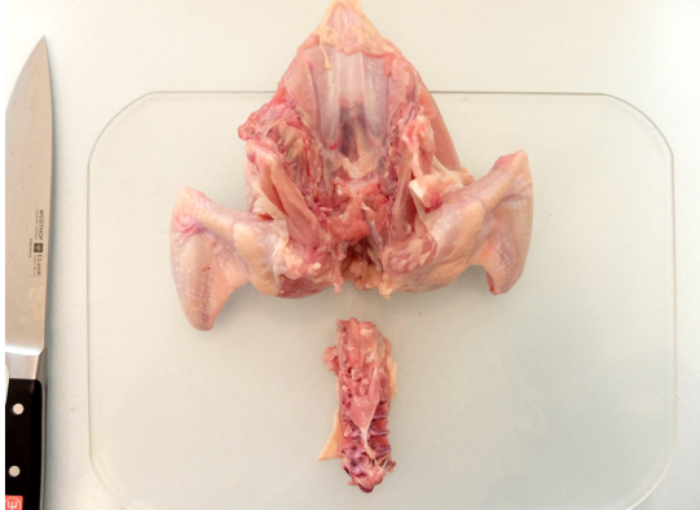
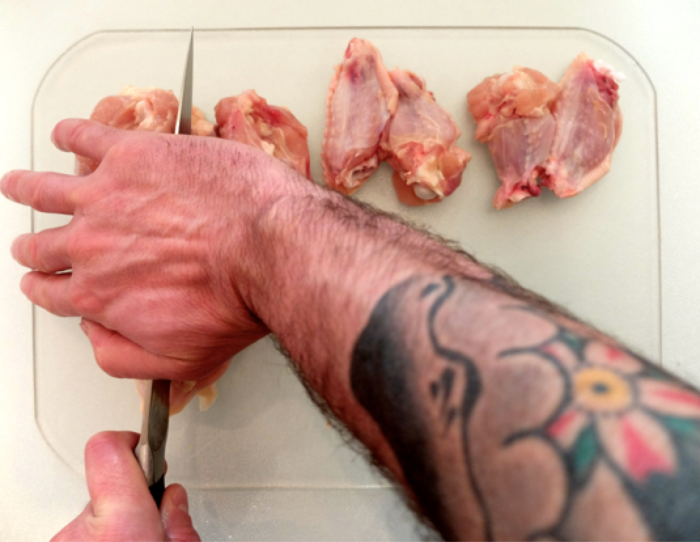
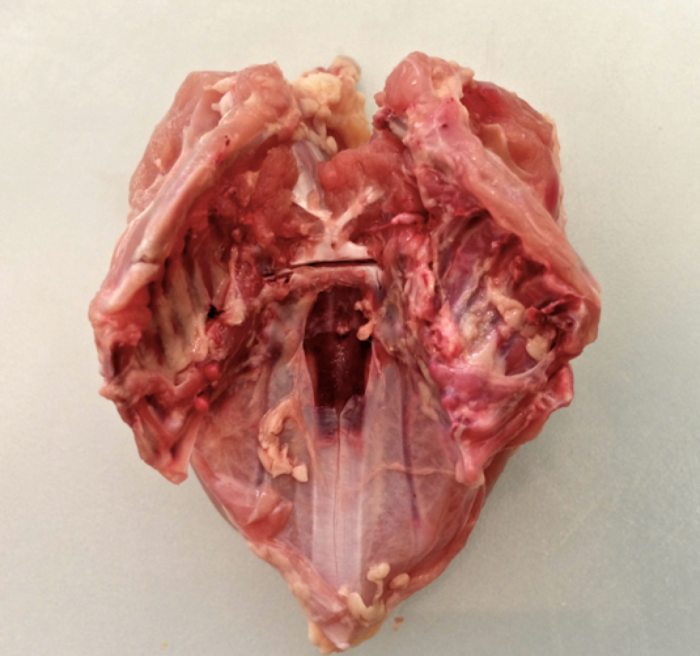
Okay, we're halfway there. Let's move on to the breast and wing. First, we'll remove the spine. Have your bird breast up and place your knife on either side of the spine and cut straight down through the smaller bones. A sharp knife and a good amount of force is all that's needed. Try to push down instead of dragging the blade across the bones. They should be tender enough to cut right through. Make sure you leave the collarbone (coracoid) attached. You'll know it if you hit it, mainly because you won't be able to cut through it.

Repeat the above steps for the other side.

And you've removed the upper portion of the spine!
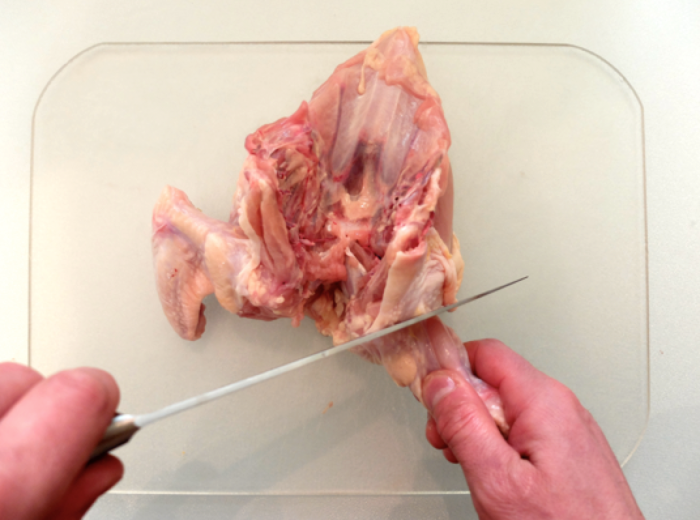
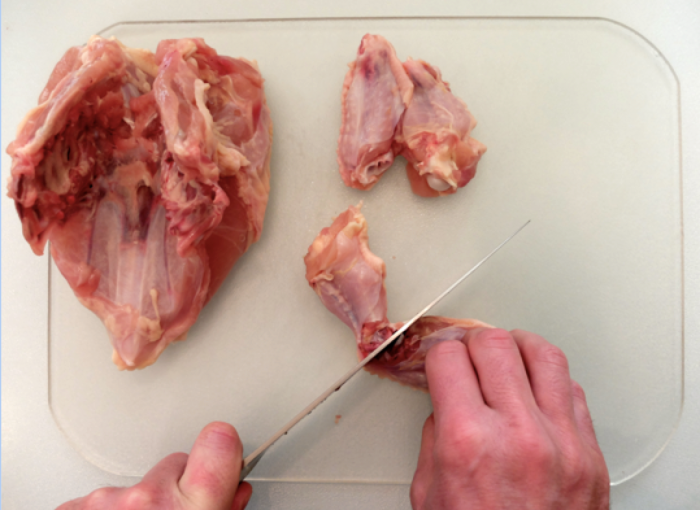
Let's get those wings off. The easiest way to explain where the joint is between the humerus (arm bone), the coracoid (collarbone) and scapula is to feel around your own body. Stick your hand under your armpit and move your arm up and down. Feel that articulation? Good — that's where you're going to cut on your chicken. Place your bird breast-side down and stretch the wing. Move it back and forth to feel the articulation between the joints. Place your knife where you see that movement and cut through. You should see the white of bone and tendon. With your fingers on the "backside" of the wing, push through the bone to sever the tendons. After a while, you'll be able to cut right through. This is applying the principles of my mentor Hans Sebald: "Use your fingers like a knife." Continue to cut all the way through, severing the wing.

Repeat the process for the other wing.
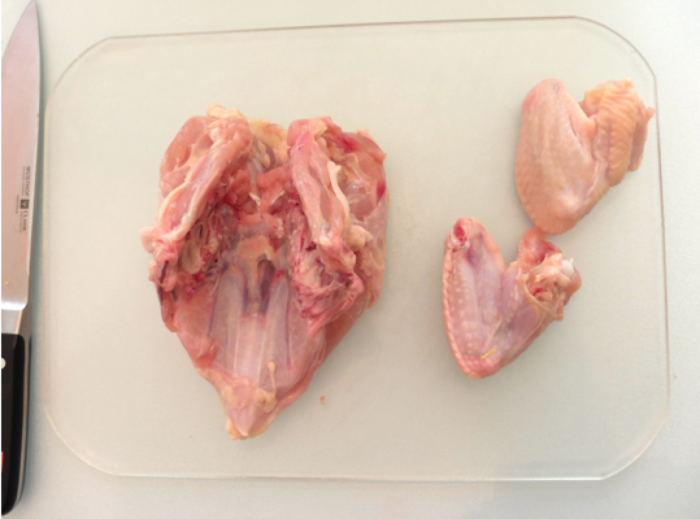
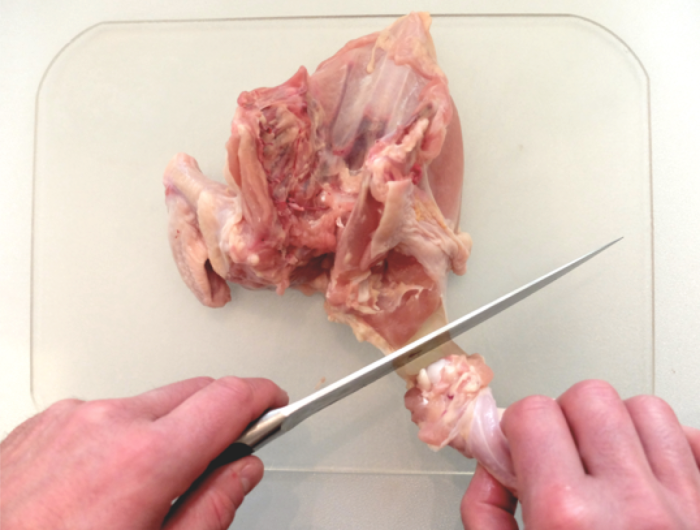
Bonus round! (Wingette and drumette)
Similar to what you did above, we'll employ our own bodies to help us locate the joint between the humerus and the ulna and radius (the bones of the forearm). Pretend like you're curling and move your forearm toward your bicep. That area where you feel movement is the joint we're looking for. I've always called it the ditch, which, in tattoo-speak, means one of the most painful places to get a tattoo. At least it was for me. So, once again, place your knife on the joint and cut through. You can use your fingers like a knife here and snap the joint loose until you get comfortable locating it.
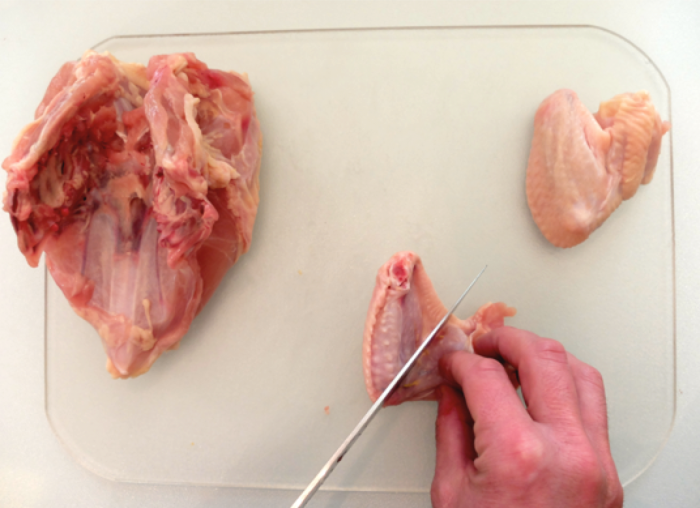

Repeat for the other wing.
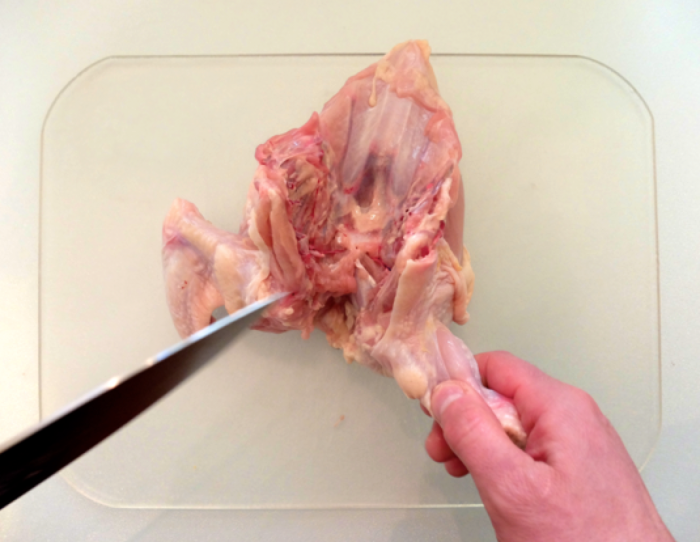
All that's left to do is to separate the two breasts. I've got two methods for you. The get-it-down method is first.
Simply take your knife and place it somewhat centered on the sternum. I say somewhat because your knife will naturally go to one side or the other as you apply pressure to the keel bone of the sternum, named appropriately, because it looks like the keel of a sailboat. It is relatively difficult to cut through it at this angle. So, place your bird breast-side down, place your knife on the sternum and carefully apply pressure with the palm of your hand, cutting all the way down to your board.
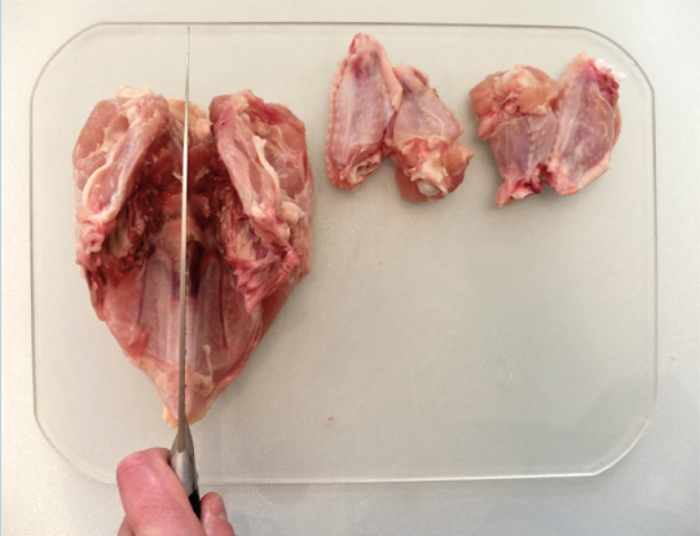
If you'd like to spend an extra minute being a little fancy, you can remove the keel bone. I usually keep my bones in, especially when it comes to breasts. Bones will act as an insulator, helping to protect against dried-out chicken breasts.
Double bonus round!
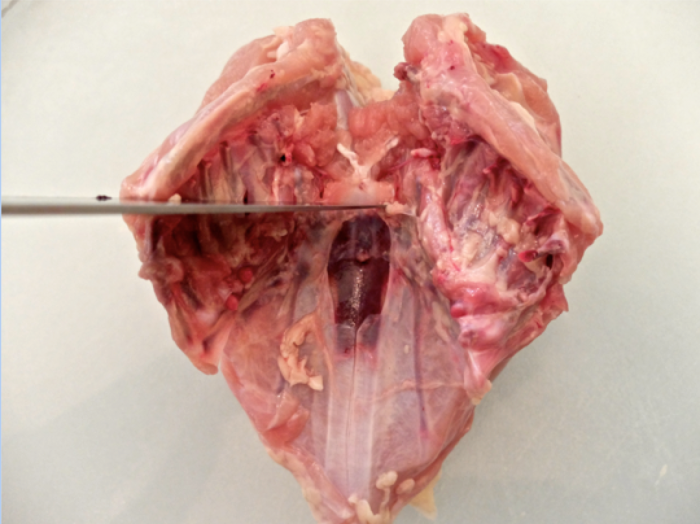
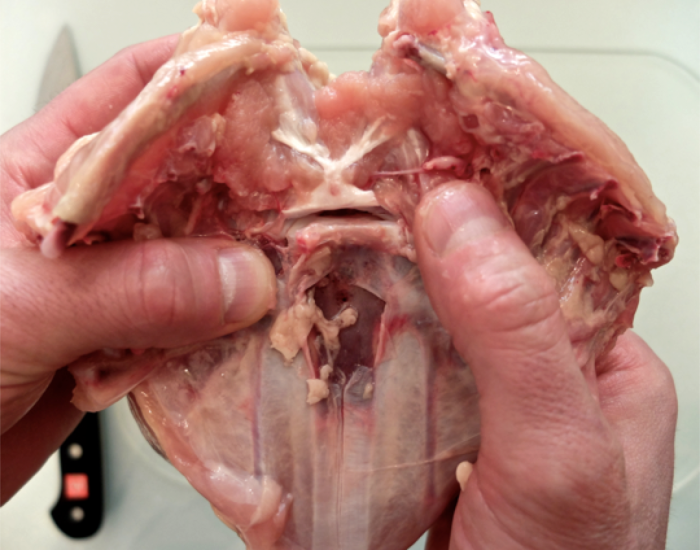
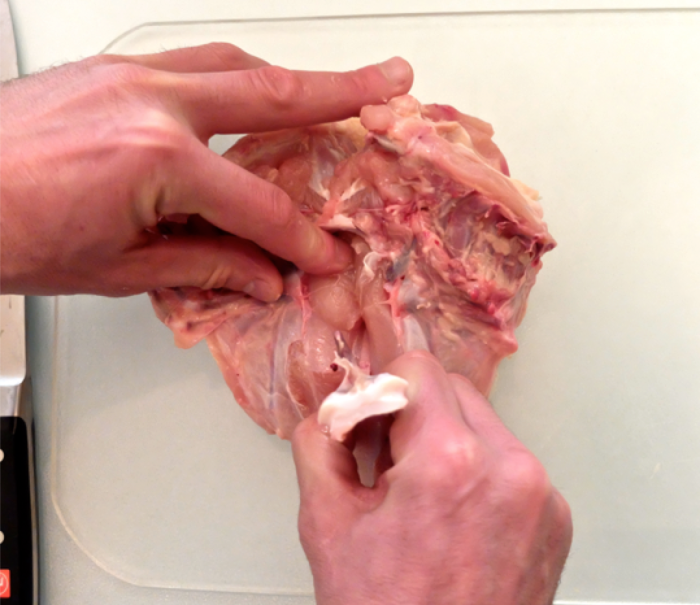
Lightly score from the top of the sternum, down to the area that is cartilage, being careful not to apply too much pressure. You want to release the fascia (bone skin), exposing the bone underneath.


At the top of the sternum, you should see a bit of cartilage. You're going to make a horizontal cut across the cartilage, applying some pressure, but make sure not to cut down into the breast. We simply want to separate the sternum from this cartilage.
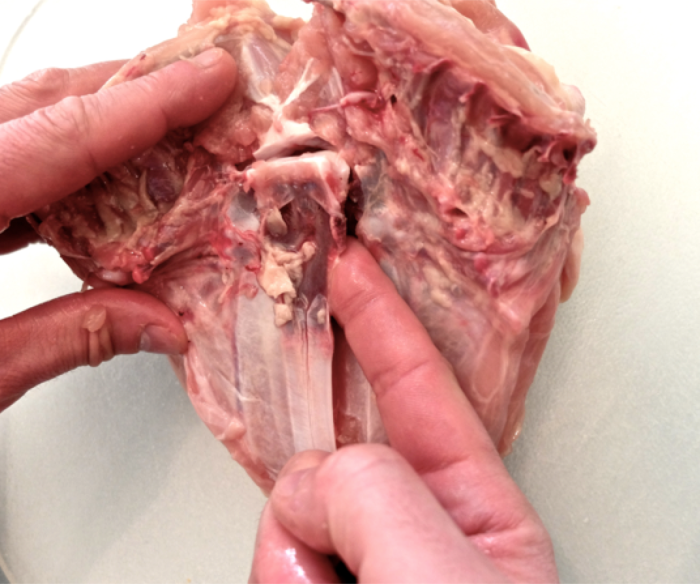
Next, holding the breast in your hands, apply pressure from both the skin side and the bone side, working around the contour of the sternum. You should feel the sternum start to dislodge as you break through the soft bones.
As the sternum starts to pull away from the fascia and the muscle, place your finger gently underneath and slide along the length of the keel bone toward the cartilage. Do this on both sides of the sternum.
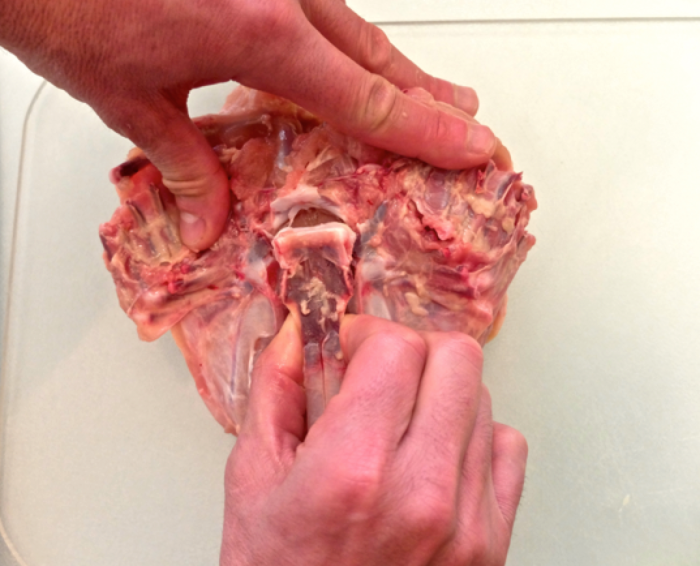
Once there is clear separation between bone and muscle, hold the sternum firmly in one hand while pushing down on the breast with the other, and gently pull away from the carcass. You may not get the sternum and the cartilage out in one piece, but that doesn't matter. It's all going into stock.
Slice through any remaining cartilage and the wishbone.

And that's it! Like I said, it may not be the best way (or even the one that you'll wind up liking), but it's a way nonetheless, and it's served me well over the years.