14 Reasons You Should Never Throw Out Old Condiment Bottles
We may receive a commission on purchases made from links.
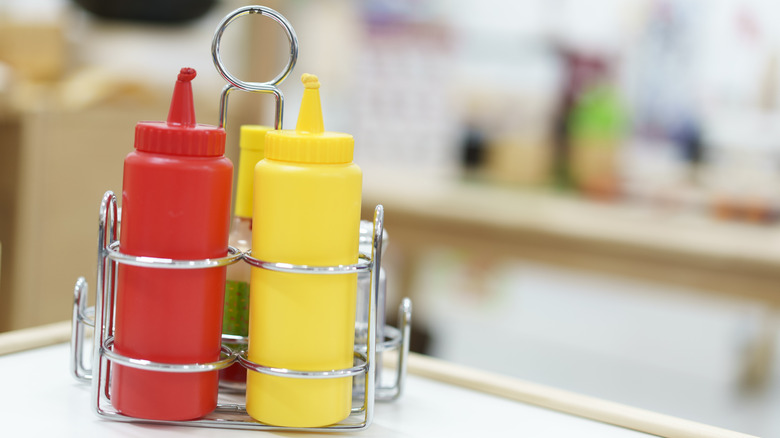
Condiment containers are a goldmine. If you're sustainably minded or simply want to stretch your food dollars as far as possible, reusing bottles and jars can help you live your values. Most of us accumulate quite a collection of these containers without even trying — from pasta sauce jars to squeeze bottles of mustard or honey. Rather than viewing them as disposable packaging, consider them as free, food-safe vessels with countless potential uses. With minimal effort, they can be thoroughly cleaned and repurposed.
Some condiment bottles can be difficult to clean, especially those glass salad dressing bottled with long, narrow necks. To get into hard-to-reach places, add a couple of teaspoons of dry, uncooked rice to the bottle. Add a squirt of dish soap and fill with warm water. Cover with the lid and shake for 30 seconds to a minute, then rinse.
Run all your bottles through a dishwashing cycle, too, even if they appear clean. Most residential dishwashers get plenty hot enough to thoroughly sanitize your bottles and jars. No dishwasher? Soak your bottles in a bleach solution for a few minutes, then air-dry. Read on for things you can do with old condiment bottles besides throwing them away.
Helping with mise en place
Condiment containers — especially small ones like individual jam or mustard jars — are a great way to store pre-measured ingredients. Chefs call this "mise en place," which literally translates to "everything in its place." It's a step chefs rely on in professional kitchens and saves you time and keeps you organized when preparing meals. A properly prepared mise en place also ensures you remember all the ingredients in a lengthy recipe.
Simply gather a variety of jars and add the pre-measured ingredients you need for your recipe. Combine any ingredients when possible; in most cake and cookie recipes, it's fine to combine the flour, salt, and baking powder in the same jar. Arrange your mise en place on a baking sheet or inside a container large enough to hold everything together. This makes it easy to start cooking when the time is right. If you want to store your mise like a chef, label all your containers with masking tape.
Gifting food
Reused condiment jars are excellent for gifting homemade food. Repurposed jars and bottles are a perfect fit for packaging holiday treats, like your signature Christmas cookies. They work well for a "meal train" style meal for a neighbor who needs some support and are a great way to send leftovers home with guests at a dinner party. By using reusing condiment jars, you'll never have to worry about whether your friends will return your prized Pyrex.
Wide-mouth glass jars like those from pasta sauce, pickles, or peanut butter easily fit cookies and other bite-sized baked goods. These larger jars are also great for soups and offer plenty of space for make-ahead jarred salads. Smaller containers are great for jams, preserves, or candies.
Personalize these jars by wrapping them with seasonal festive paper labels or tying them with twine. For dinner party leftovers, a label with the date of the party and any recipe information elevates your guests' take-away. For full gifted meals, label your jars with storage or reheating instructions. If you are the neighborhood Martha Stewart, consider printing signature stickers to add a touch of flair to your repurposed jars.
Using them for leftovers
Condiment jars can be the perfect size for small amounts of leftovers. Plastic or glass containers work well, but consider the potential for staining when selecting your vessel. Plastic containers can stain easily, so opt for glass when storing any items prone to staining.
Whether you plan to freeze or refrigerate the contents will also dictate what type of repurposed container is best. If freezing the containers, plastic is more forgiving; plastic allows more flexibility for liquids to expand and plastic containers may have more airtight seals. You can freeze glass jars, of course, just be sure to leave at least 1 inch of head space at the top of the jar to allow for some expansion as the food freezes.
If you care about maintaining a stylish fridgescape, you'll also want to think about the look of your jars. Label-free glass jars of a uniform size, with matching lids give a peaceful, organized aesthetic. Novelty bottles with whimsical shapes like leaf-shaped maple syrup bottles or bear-shaped honey bottles help you lean into a cottage-core vibe.
Elevating your spice rack
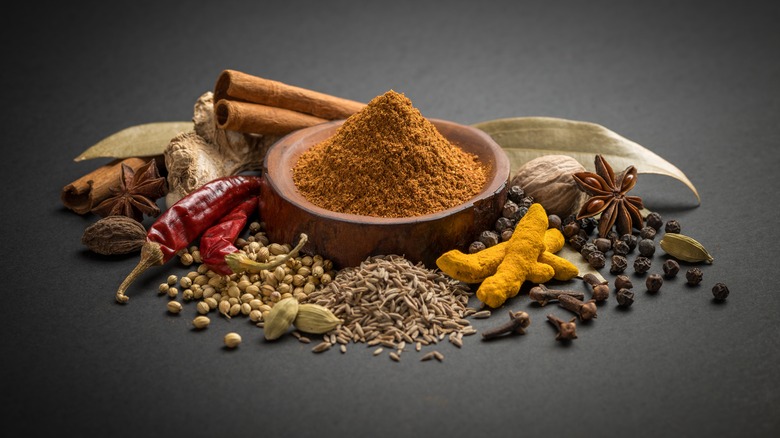
Small, uniquely shaped bottles from capers, vanilla extract, or specialty oils create an eye-catching spice display that elevates your kitchen's aesthetic while keeping frequently used seasonings within easy reach. For bulk spices purchased from co-ops or specialty stores, repurposed Parmesan cheese bottles are the GOAT with their wide openings for easy measuring and shaker tops perfect for easy sprinkling.
To create a cohesive spice rack, you'll want to create labels for each spice. So your first step will be removing the labels from the repurposed bottles, and some of them can be stubborn. Soak bottles with stubborn labels in hot soapy water. Most paper labels will slip off after 10 to 20 minutes. Baking soda or citrus-based degreasers (like Goo Gone) help you remove any remaining adhesive residue.
It's easy to print your own labels for your repurposed bottles and jars on standard Avery labels in your own home. Want to capture a specific look that is beyond your creative skills? Etsy makers sell custom spice jar labels to add some uniformity to your multi-sized jars.
They're perfect for bulk goods
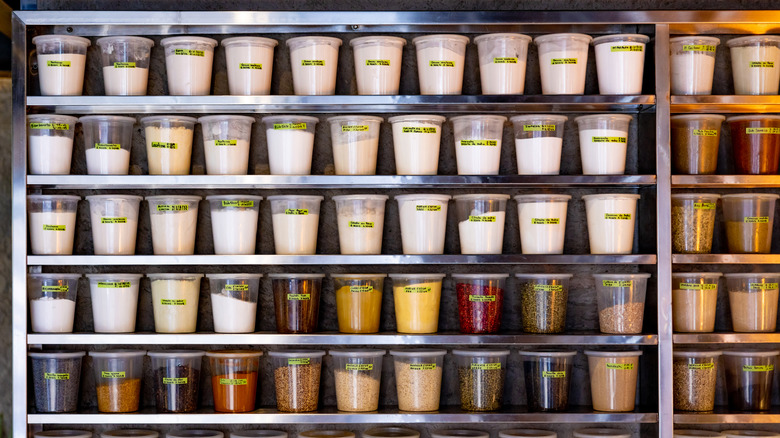
Larger glass containers from salad dressings, salsa, mayonnaise, and marinades provide perfect storage solutions for dry pantry staples. These containers help extend the shelf life of bulk goods while keeping your pantry organized. The transparency of glass containers allows you to easily monitor inventory levels, preventing overbuying or running short on essential ingredients. Glass is also mouse- and ant-proof, protecting your bulk goods from unwelcome pantry invaders.
Before filling containers with dry goods, ensure they're completely dry. Moisture can encourage your ingredients to mold or spoil. For long-term storage of flour, sugar, or other moisture-sensitive items, add a small food-grade silica gel packet. If you have any dark glass bottles, they are great for delicate or light-sensitive items, such as tea leaves.
Consider the access requirements for each ingredient — will you need to fit measuring cups inside? Will you pour directly from the container? Match your container choice accordingly. Taller, narrower bottles with wide mouths work well for dry pasta noodles. Wide-mouth jars are an excellent fit for sugar or flour, as they more easily accommodate scoops. Narrow-necked bottles are ideal for vinegars and oils that require slow pouring.
Vessels for infusing
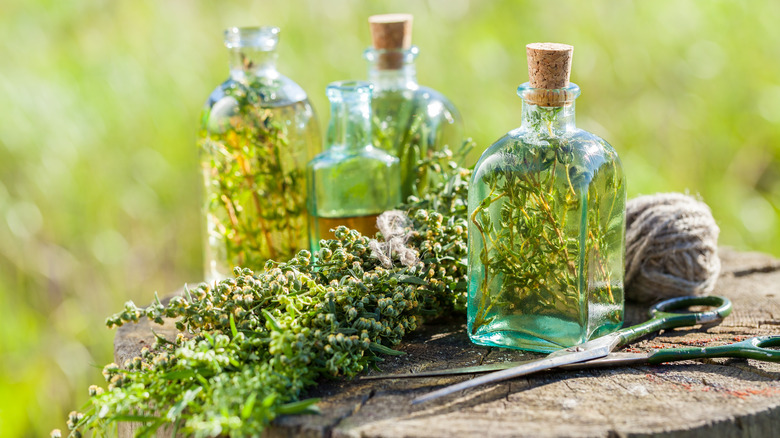
Glass bottles with tight-sealing lids create the perfect vessels for crafting homemade infusions that elevate your cooking and entertaining. Salad dressing bottles with narrow necks work particularly well for oils and vinegars, while wider-mouthed sauce jars accommodate larger ingredients like citrus peels, vanilla beans, or whole spices.
When using fresh ingredients like garlic, fruit, or fresh herbs, acidify them in a citric acid solution before infusing. This prevents botulism. Dry ingredients, like dried herbs and spices, can be used safely without this step.
You can find citric acid with the canning supplies at your local grocery or health food store. This amount of solution works for either 8 ounces of chopped garlic bulbs, or up to 2 cups of fresh herbs. Soak your garlic or herbs in this solution for 24 hours. Then, remove them from the solution and pat dry before using. Add your infusion ingredients to a clean, sterilized jar and infuse in a cool, dry place for one to 10 days. Alcohol infusions for homemade extracts require longer steeping. Vanilla extract requires at least eight weeks for full flavor development, using four to six split beans per cup of 70-proof vodka.
Garlic-infused olive oil is a classic oil infusion. Tarragon-infused vinegar is a key ingredient in many French sauces and marinades. Oil infusions last one to two months when refrigerated. Vinegar infusions last for six to eight months when refrigerated or two to three months when stored in a cool, dry place. Alcohol infusions, like homemade vanilla extract, can last years if sealed and stored properly.
Helping make foolproof pancakes
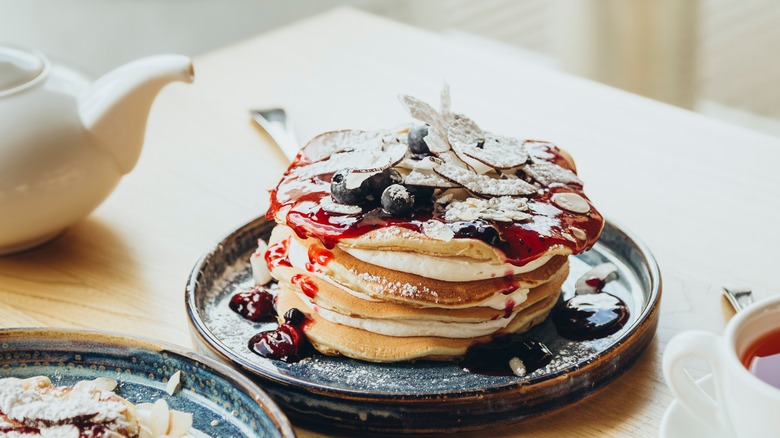
Squeeze-top condiment containers can be a game changer for preparing your favorite pancake recipe. Thoroughly-cleaned ketchup, mustard, and mayonnaise bottles with their squeeze-activated applicator tips give you exceptional control for creating perfect portions. They're also great for batter-based treats like funnel cakes.
For thicker batters, you may need to widen the opening slightly by carefully trimming the tip with kitchen scissors. This can prevent clogging while maintaining control over batter flow. For thinner batters, such as funnel cake batter, the original opening size typically works perfectly.
Store premade batters in these containers in the refrigerator for up to 24 hours for grab-and-go breakfast preparation. This approach not only saves time but improves flavor development in batters that benefit from resting. After, fill the bottles with warm, soapy water and shake vigorously to clean. Alternatively, use the rice-cleaning trick mentioned earlier for stubborn residue. A thin bottle brush can help access hard-to-reach areas before sanitizing in the dishwasher.
Upping your plating game
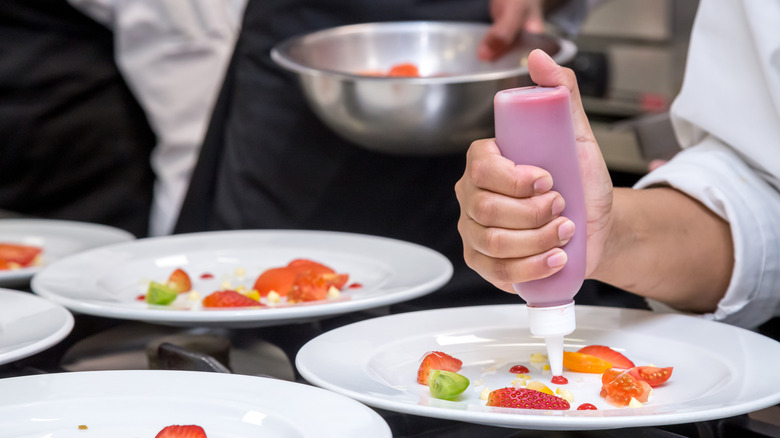
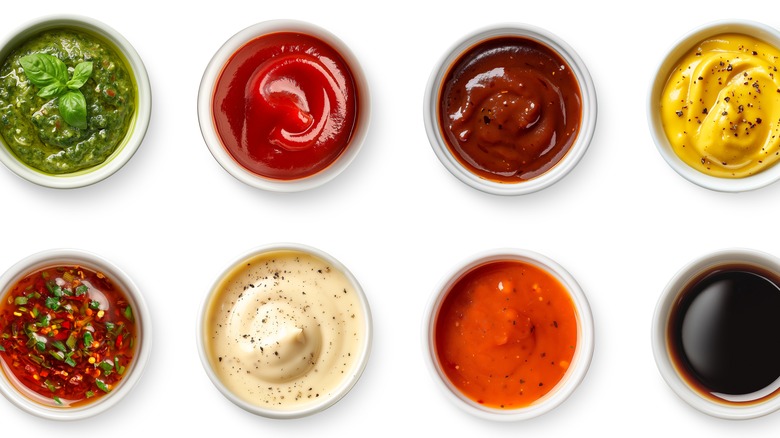
Squeeze bottles make excellent garnishing tools. Add a sauce or garnish to a squeeze bottle to enhance the presentation of your plates. The classic narrow-tipped ketchup, mustard, or honey bottles are ideal for creating elegant sauce swirls, perfect dots, or intricate patterns that transform ordinary plates into artistic culinary statements. This simple kitchen hack instantly upgrades your presentation skills without requiring special equipment.
Optimal sauces for garnishing include purées with medium viscosity — thick enough to hold their shape but fluid enough to flow smoothly through the bottle opening — like ketchup. Medium-bodied sauces, such as aioli and fruit coulis, balsamic reductions, herb oils, or chocolate ganache, work particularly well.
Start practicing with simple patterns, such as dots of decreasing size, straight lines, gentle curves, or concentric circles. Once you get comfortable, advance to more complex designs like hearts, figure-eights, or complementary sauce combinations that play with color and flavor. After use, clean your bottles immediately by filling them with warm, soapy water and squeezing repeatedly to prevent dried residue from clogging the tips.
Shaking up great dressings

Old salad dressing bottles are excellent for making new salad dressings. Add your ingredients and shake, shake, shake to emulsify a freshly made dressing. This also works for making new marinades. The narrow necks and secure lids of these containers create ideal conditions for vigorously shaking ingredients together, forming stable emulsions that can be tiring to make with simple whisking.
For vinaigrettes, follow the standard ratio of one part acid (like vinegar or citrus juice) to three parts oil for balanced flavor. Emulsifiers like Dijon mustard (1 teaspoon per cup of dressing) or honey help ingredients bind together, creating more stable emulsions. Place all the ingredients in your clean, dry bottle, secure the lid tightly, and shake vigorously for 30 to 60 seconds until the mixture is thoroughly combined. Label your creations with ingredients and preparation dates. Most homemade dressings remain fresh for five to eight days when refrigerated.
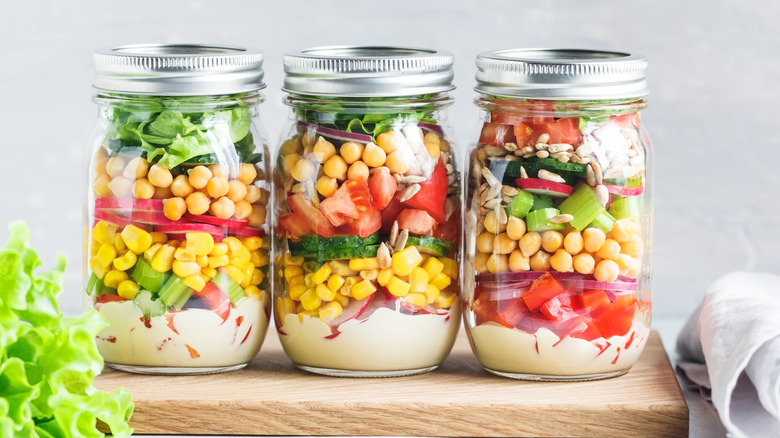
Showing off layered desserts
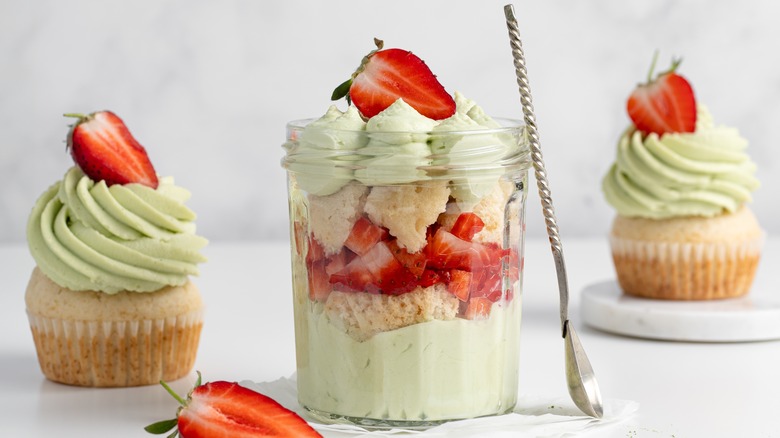
Empty jars make excellent vessels for single-serving sweets. Low-profile, wide-mouth jars, such as those used for salsa or jam, create perfect single-serving containers for layered trifles, parfaits, cheesecakes, and puddings.
When preparing desserts in jars, consider both visual appeal and ease of eating. Create distinct layers by chilling the jars briefly after adding each component. Use a piping bag to add ingredients — like whipped cream or lemon curd — that are on the runnier side. Leave about ½ inch of headspace at the top for garnishes.
These portable desserts are terrific for picnics, potlucks, and outdoor gatherings where traditional plated desserts can quickly get messy or melt. For transportable treats, select jars with secure, leak-proof lids and pack them in insulated containers with ice packs if refrigeration is needed. Remove the lids upon serving and garnish with fresh elements, such as mint leaves, fresh berries, or a final dusting of powdered sugar.
Beyond convenience, jar desserts offer creative opportunities for customization. If you're entertaining a crowd with dietary restrictions or food allergies, jarred individual desserts are a perfect fit. Another fun bonus? Most glass jars can stand reheating in the microwave or a low-temperature oven. So you can warm desserts like cobblers or bread puddings directly in their serving containers before enjoying them.
Sprouting fresh greens in them
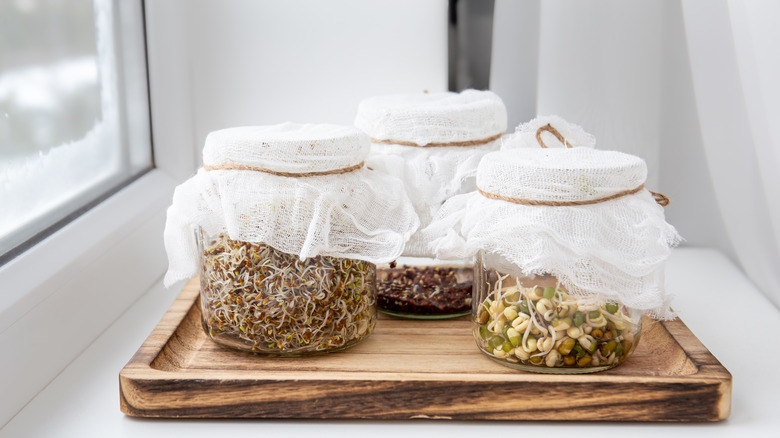
Clean glass jars from mayonnaise, pickles, or jelly are excellent vessels for regrowing fresh green leaves from scallions or lettuce. Simply add water to a clear jar, tuck your lettuce core or other food scrap into about an inch of water, and place it in a sunny window. Change the water daily, and in a few days, you'll have fresh scallion greens or tender lettuce leaves.
Add a vented lid, and you could repurpose these sterilized jars for growing alfalfa or bean sprouts. When using jars for growing sprouts, sterilizing your jars is absolutely crucial. The warm, wet environment sprouts love is also the ideal environment for growing salmonella and e coli. Most home dishwashers get hot enough to sterilize bottles during a regular wash cycle, but double check your model's user manual. If you don't have a dishwasher, you can sterilize bottles in a bleach solution or boiling water bath.
To make sprouts, add seeds to a jar and cover with cool water. Cover the jar opening with cheesecloth and a rubber band or use stainless steel sprouting lids. Soak the seeds for eight to 12 hours, then tip the jar to drain them thoroughly. Rest your jar in a bowl or vase to keep it at about a 45-degree angle. This encourages air flow and drainage. Rinse and drain seeds twice daily. Most sprouts are ready to eat within three to seven days, depending on the seed. One to 2 tablespoons of seeds is enough to fill a 32-ounce jar.
Storing beverages in them
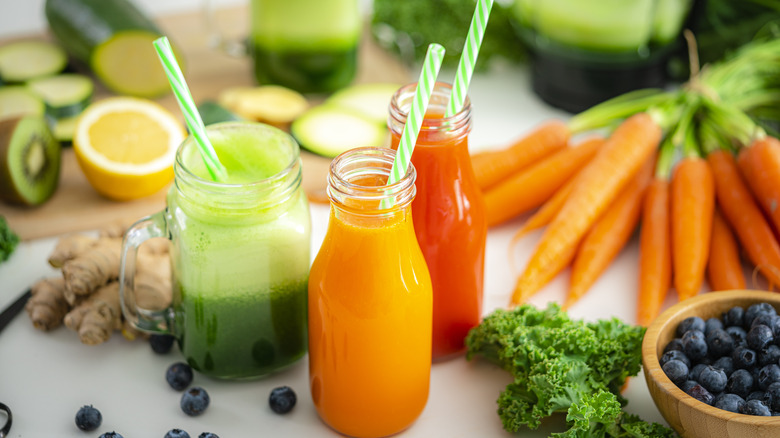
Clean bottles from salad dressings, olive oil, and specialty juices with their original, intact caps are perfect for homemade beverages. Decant your cold brew coffee, fresh juice blend, or even a specialty cocktail to take on-the-go or serve at a party. These bottles' narrow necks are comfortable to drink or pour from, and their fitted caps prevent spills.
For events and parties, pre-portioned cocktails or mocktails in individual jars are an elegant way to prevent a line (and mess) at the bar. Prepare signature drinks up to a day in advance and label them with before storing them in the refrigerator. Adding labels to dry, room-temperature glass is the best way to ensure they stick.
When repurposing containers for beverages, pay special attention to cleaning caps and seals, which can harbor residual flavors or odors. If you notice any unwelcome aromas in your bottle caps, cover them completely with a paste of baking soda and water and let them sit overnight. Test for potential leakage before transporting by filling the containers with water and inverting them completely.
Plastic bottles also work for this, but glass is preferable if you have it. There's a reason milk lasts longer in glass bottles. The thermal properties of glass help maintain cool temperatures longer than plastic alternatives, keeping cold drinks chilled during transport or service. Plastic can leach some off flavors or chemicals into citrusy or acidic beverages, so for fresh juices especially, glass is better.
They're great kitchen organizers
Repurposed glass jars bring order to the chaos of small kitchen implements that constantly disappear when needed most. From measuring spoons and frosting tips to meat thermometers and specialized gadgets, these transparent containers keep essential tools visible and accessible exactly where you use them. Unlike drawers where items disappear, open jar storage on countertops or shelves creates functional displays that can enhance your kitchen's efficiency.
Shorter, wider jars with large openings work perfectly for frequently-used utensils like tasting spoons or measuring spoons. Taller, narrower containers hold longer implements like chopsticks, skewers, or piping bags. Small spice jars corralled in a larger container create perfect storage for tiny specialized parts like pastry tips or garnishing tools.
Consider organizing by task rather than item type for maximum practicality, especially if you make a lot of one type of dish. If you're a busy home baker, place all your precision baking tools (measuring spoons, offset spatulas, piping bags) in containers near your baking station. If you're a champion meat smoker, group meat preparation tools (thermometers, trussing needles, marinade brushes) near your cutting board.
It's not all about utility, though. Repurposed containers can add to your kitchen's aesthetic. Create visual cohesion by grouping similar materials (all wood, all metal, all silicone) together in clear jars. Create a spectrum effect by color-coordinating your cooking tools. Personalize jars with glass etching cream or removable labels.
Feeding hummingbirds
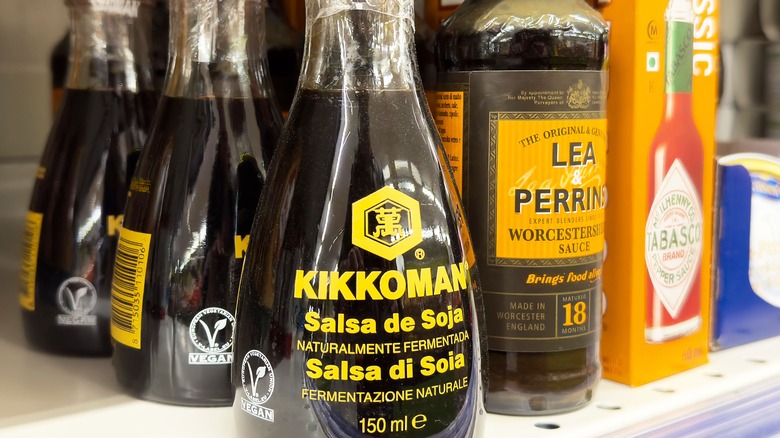
The slow-pour spouts of 5-ounce Kikkoman soy sauce bottles, specifically the ones with red tops, make excellent hummingbird feeders. Hummingbirds associate the color red with nectar-rich flowers, so the red caps attract the birds' attention. With the bottle turned upside down, the pressure from the liquid inside prevents drips. The small holes that make these bottles portion soy sauce also happen to be the perfect size and shape for hummingbird beaks.
Start with a spotlessly clean Kikkoman bottle. Make a sugar syrup of one part sugar to four parts water. To fill this container, 1 ounce of sugar to 4 ounces of water works well. Stir until the sugar dissolves, then fill your container. Hang the bottle upside down from a tree branch or a porch post. Repurpose a wire hanger to make a coil that fits around the bottle's neck. Or, secure the bottle upside down with kitchen twine and hang it from an S-hook. Replace the sugar-water mixture every two days. Thoroughly clean the bottle before refilling to keep the spouts clear and prevent mold.